Step 1 – Create the qcow2 files for KVM
- Navigate to Connectors > DNS Forwarders and click Download Components.

- Click Download for VA VMWare ESXi.
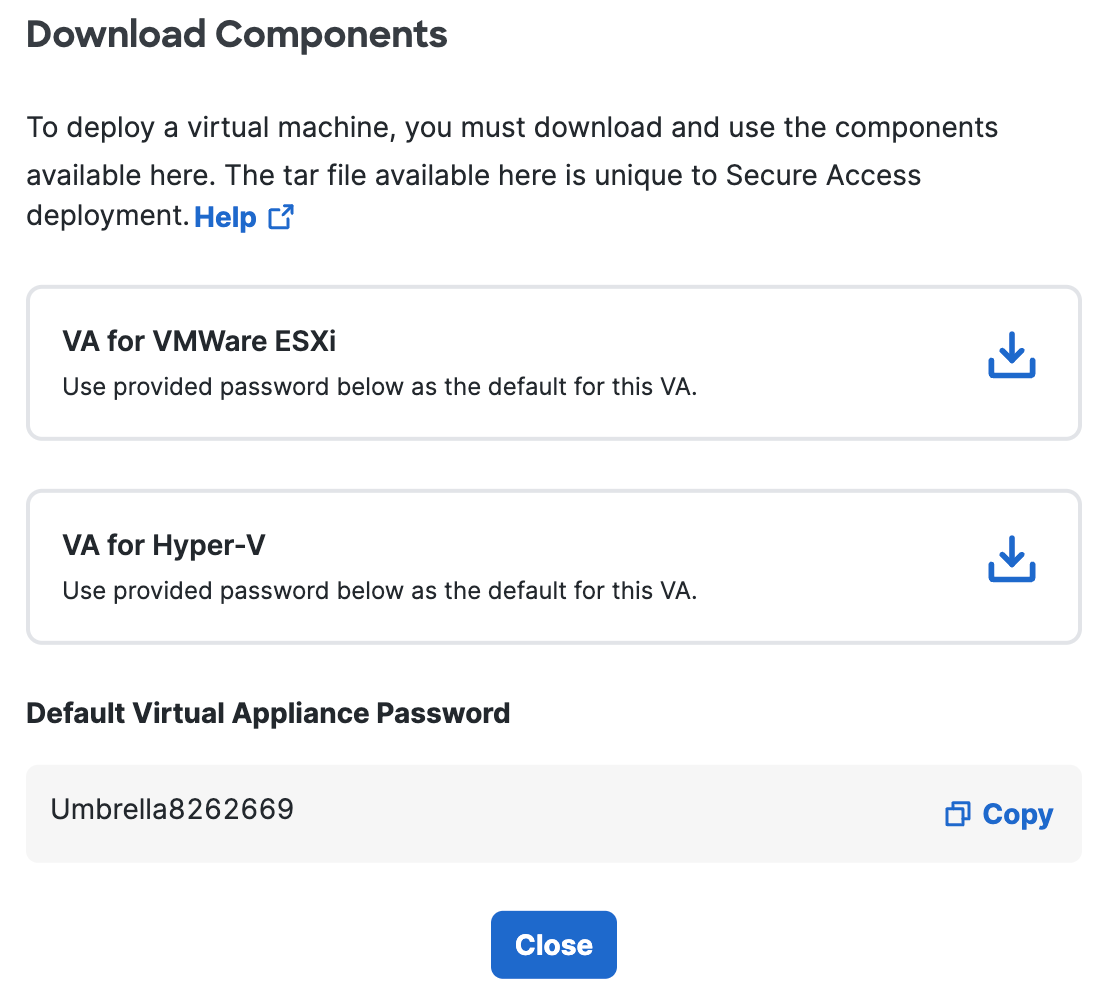
Secure Access generates and downloads a .tar file unique to your deployment.
This tar file includes:
-
an .ova template containing the virtual hard disks that need to be deployed on KVM
-
a signature file
-
a Cisco public certificate to validate the signature
-
a readme file
-
-
Extract the contents of the tar file using the command
tar –xvf <tar filename> -C <Destination folder>.To verify the integrity of the downloaded file, validate the signature by following the instructions provided in the readme file. When successful, you should see a message saying “Verified OK."
-
Extract the downloaded.ova file to retrieve the vmdk files.
-
Use the qemu-img convert commands to convert each of the vmdk files to the qcow2 format.
qemu-img convert -f vmdk -O qcow2 forwarder-va.vmdk forwarder-va.qcow2 qemu-img convert -f vmdk -O qcow2 dynamic.vmdk dynamic.qcow2 -
Copy both the qcow2 files on your Linux system running KVM.

Deploying the VA results in a modification of the source qcow2 files. Thus, you must copy the qcow2 files each time you deploy a new VA.

