Step 2 – Configure the Resource Connector Virtual Machine
Create a resource connector virtual machine on Azure.
-
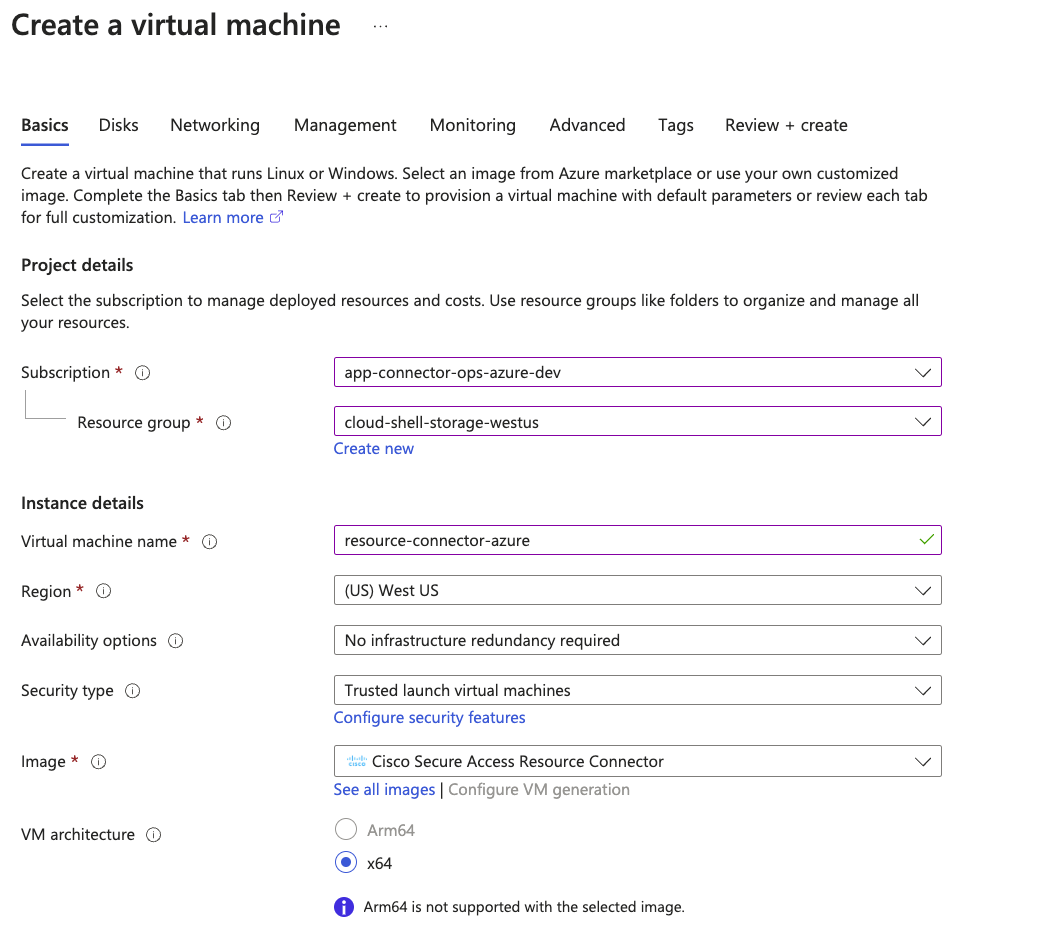
On Create a virtual machine, click the Basics tab.

For Disks, Networking, Management, Monitoring, and Tags, you can modify the settings for you cloud environment or keep the default selections.
-
Navigate to Project details.
-
Choose your Subscription and Resource Group.
-
- Navigate to Instance details.
-
For Virtual machine name, enter a name for the virtual machine.
-
For Region, choose the region where the private resource is deployed in your cloud environment.
-
For Security type, use the default setting: Trusted launch virtual machines.
The Trusted launch virtual machines default setting selects the Enable secure boot option. For more information, see UEFI Secure Boot Environment for Resource Connector Images.
-
For VM architecture, choose the x64 architecture for the virtual machine.
-
For Size, choose Recommended by image publisher types.
Note: You do not have to configure the image. Image is preselected.
-
-
Navigate to Administrator account.
- For Authentication type, choose SSH public key.
-
For Username, use the default setting: azureuser. The azureuser username is an internal account that does not have login access. You must deploy the VM with the username azureuser.
You can only log into the resource connector instance with the username acadmin.
Choose an existing SSH key pair or generate an SSH key pair to enable access to the connector instance. Save your SSH key to your local system.
SSH access to the resource connector VM is required in order to troubleshoot an issue or get information about the connector to provide to Support.
-
Click the Advanced tab.
-
Check Enable user data.
-
For User data, in the text box, type KEY="" and paste the provisioning key that you copied from the connector group in Secure Access between the quotation marks, with no spaces anywhere in the text box. For more information about creating connector provisioning keys, see Provisioning Keys for Resource Connectors.

-
-
Navigate to the Review + create tab.
-
Click Create to deploy the instance of the resource connector in the virtual machine.
-
-
(Optional) Compare the ID of the deployed virtual machine on Azure with the Connector ID for the resource connector on Secure Access.
-
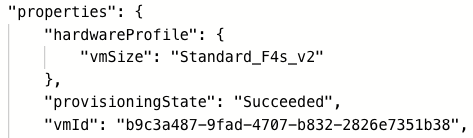
On Azure, navigate to Home > Virtual Machines and then click the name of a virtual machine. From a virtual machine, navigate to Overview, and then click JSON View.
The JSON View displays the properties of the deployed resource connector instance. The value of the vmId property is the ID of the virtual machine.
-
On Secure Access, navigate to Connect > Network Connections > Connector Groups.
Locate the resource connector by the Connector ID. Verify that the Connector ID for the deployed resource connector matches the ID of your virtual machine on Azure.

-


