View a Discovery Scan
Before you begin
Procedure
| 1 |
Navigate to . Click the Discovery tab. |
||
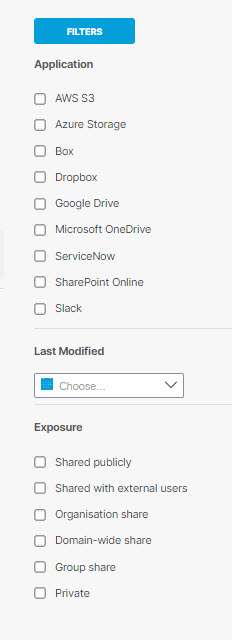
| 2 |
Use Filters to filter the data by Application,
Last Modified, and Exposure. |
||
| 3 |
Choose a Scan from the drop-down. Click Apply to view the details.

|
||
| 4 |
If there is an ongoing scan, the results are displayed. Click
Cancel Scan
to stop the
ongoing scan. (You can only run one scan at a time.) |
||
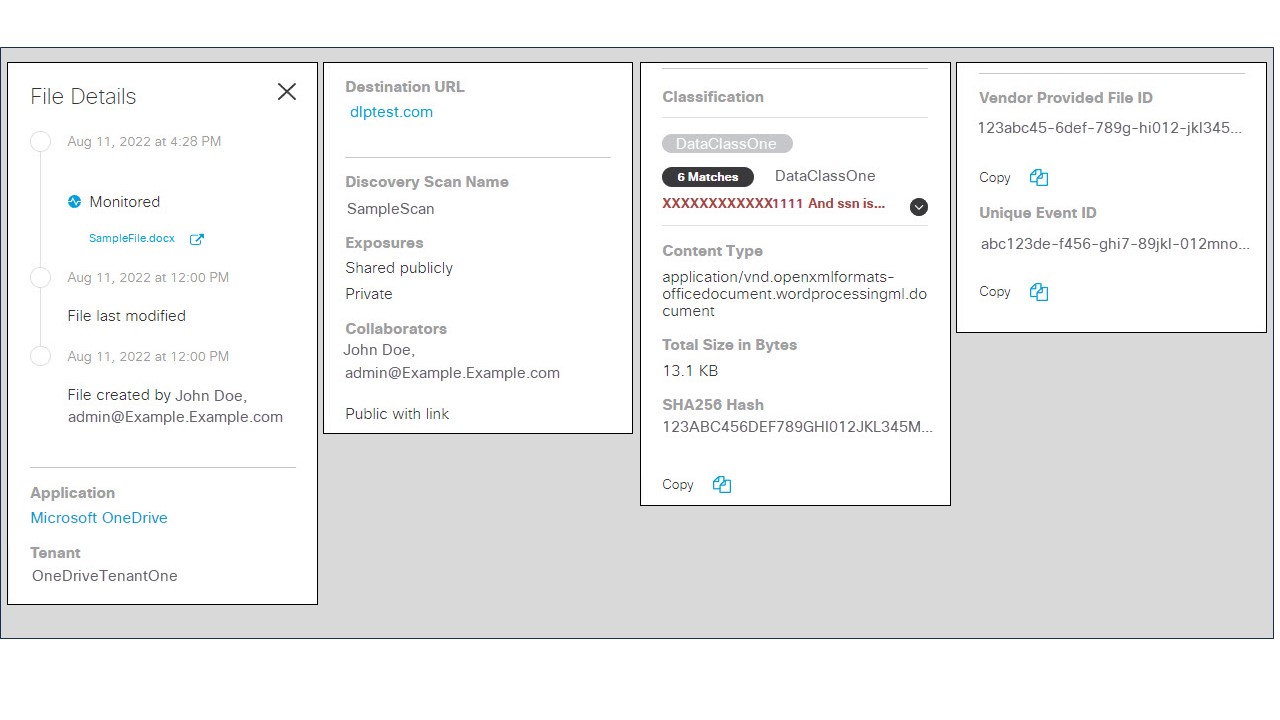
| 5 |
Click the action menu icon (three dots) to view further details of a
file. |