Create Always On VPN Profile
Procedure
| 1 |
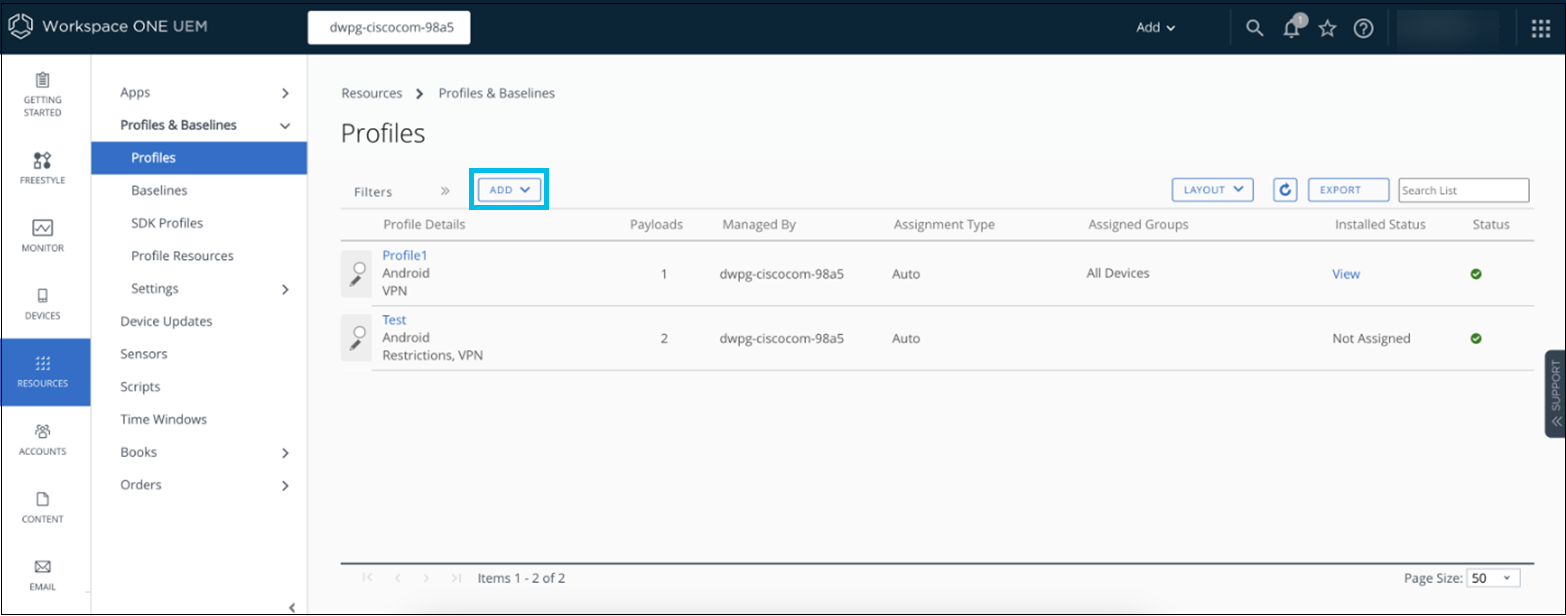
In the Workspace ONE UEM console, navigate to . |
||
| 2 |
Click Add and choose Add Profile from the drop-down list. |
||
| 3 |
Select Android as the platform. |
||
| 4 |
Choose CUSTOM DPC or ANDROID MANAGEMENT API as the Management Type and click Next. |
||
| 5 |
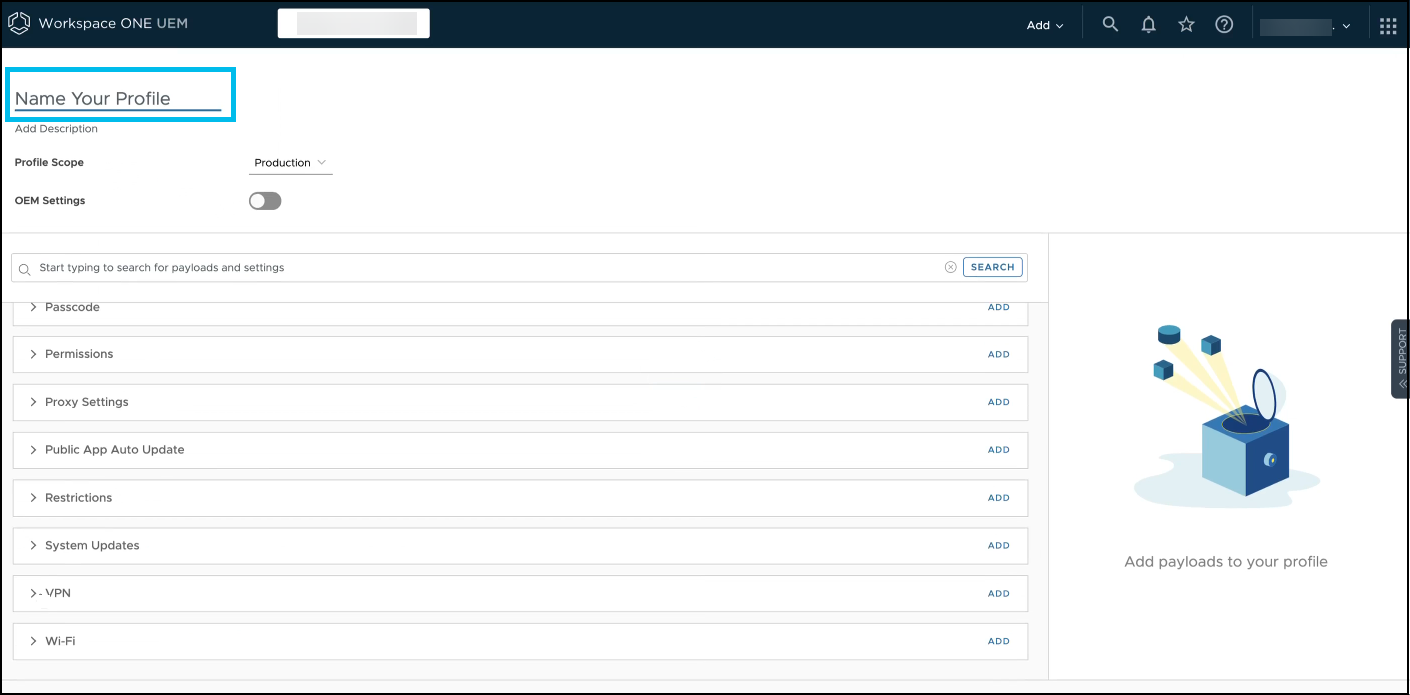
Enter a name for your profile. For example, Always On VPN. |
||
| 6 |
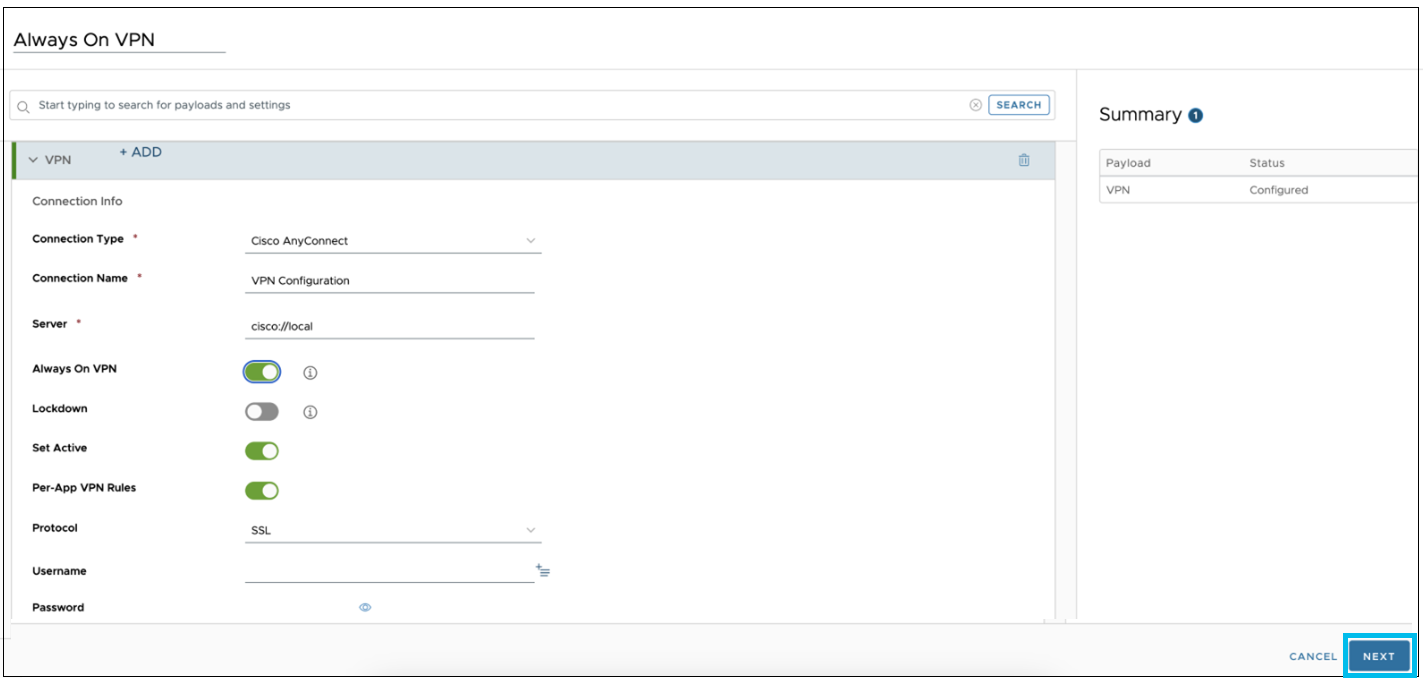
Navigate to the VPN section and click Add. |
||
| 7 |
In the VPN setting configuration section, complete the fields, including the following:
|
||
| 8 |
Click Next. |
||
| 9 |
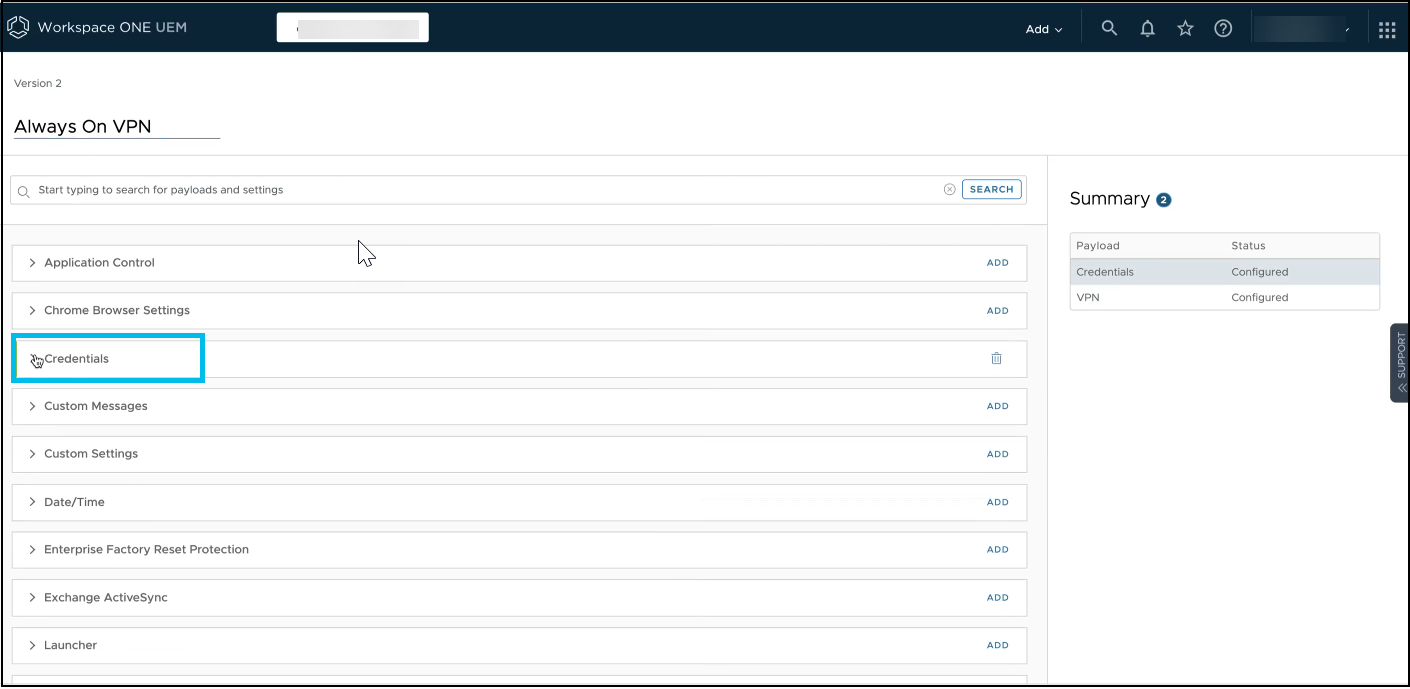
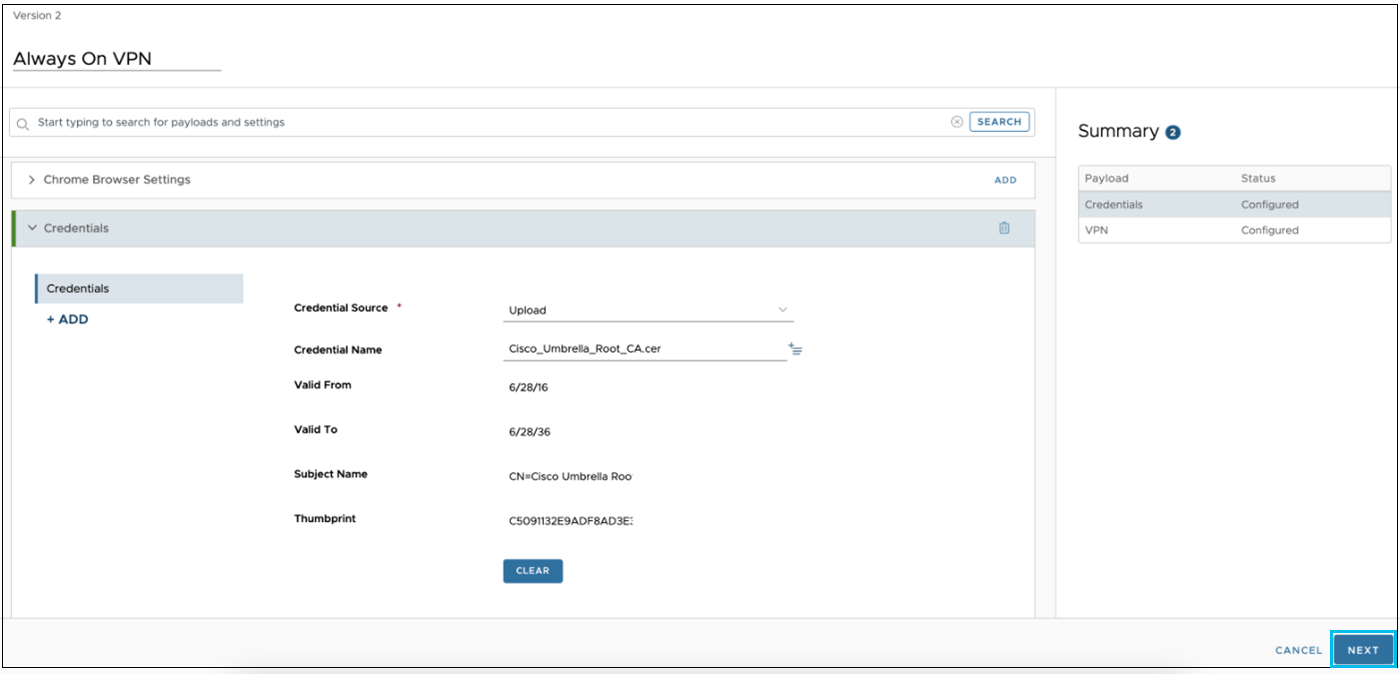
Search or navigate to the Credentials section, and click Add. |
||
| 10 |
In the Credential section, do the following:
|
||
| 11 |
After successful upload of the certificate, the Credential Name would be added automatically and then click Next. |
||
| 12 |
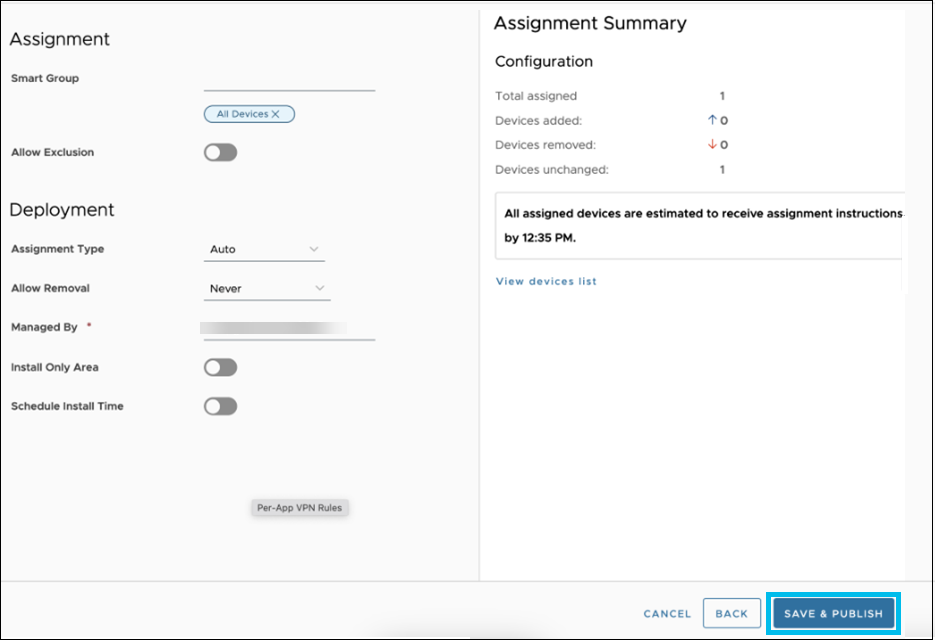
In the Assignment and Deployment profile settings screen, complete the fields, including the following:
|
||
| 13 |
Click Save & Publish. |

