Step 4: Create a static route table in Azure
Add a table of branch routes and internet routes to the primary VPN gateway and associate the route table with any required subnets. For more information, see Azure: Create, change, or delete a route table.
- In the Azure admin portal, navigate to Overview > Resource group (click the name of your resource group) > + Create.
- Search the marketplace for Route table, then click Create.
- Configure the Basics tab of the route table.
- Select the Subscription and Resource group of your virtual network.
- Review the configuration, then click Create. Azure will deploy the route table and update the dashboard when deployment is complete.
- Navigate to Overview > Resource group (click the name of your resource group) > Resources, then click the name of your route table.
-
Click + Add.
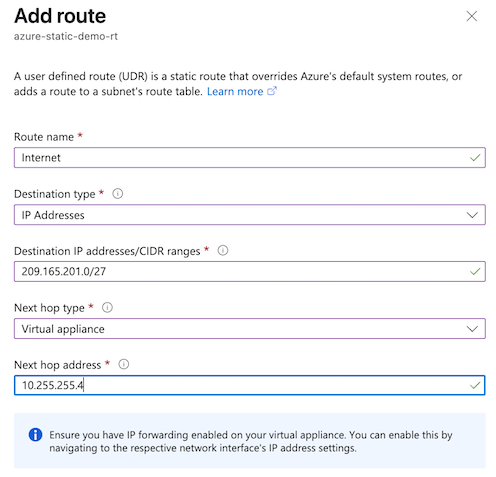
- Configure a route.
- Route name: The example in the image is Internet.
- Destination type: IP Addresses.
- Destination IP addresses/CIDR ranges: Enter the IP ranges for branch sites configured as address spaces for Azure local network gateways. This example uses 209.165.201.0/27.
- Next hop type: Virtual appliance.
- Next hop address: Enter the first IP address returned by this Azure CloudShell command. In this example, the next hop address is 10.255.255.4.
az network vnet-gateway show --resource-group \<Resource Group Name> -n \<VNET Gateway Name> | jq .bgpSettings.bgpPeeringAddress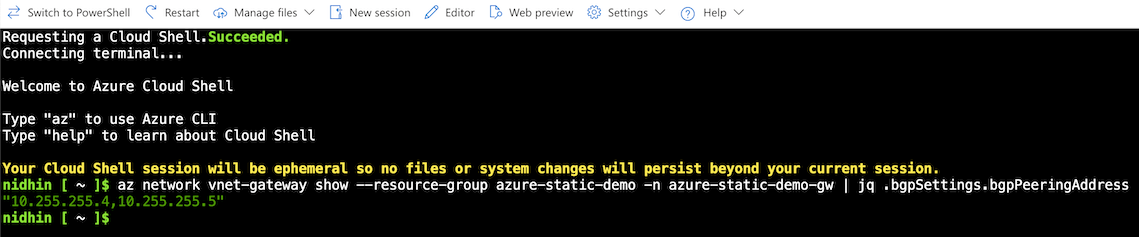

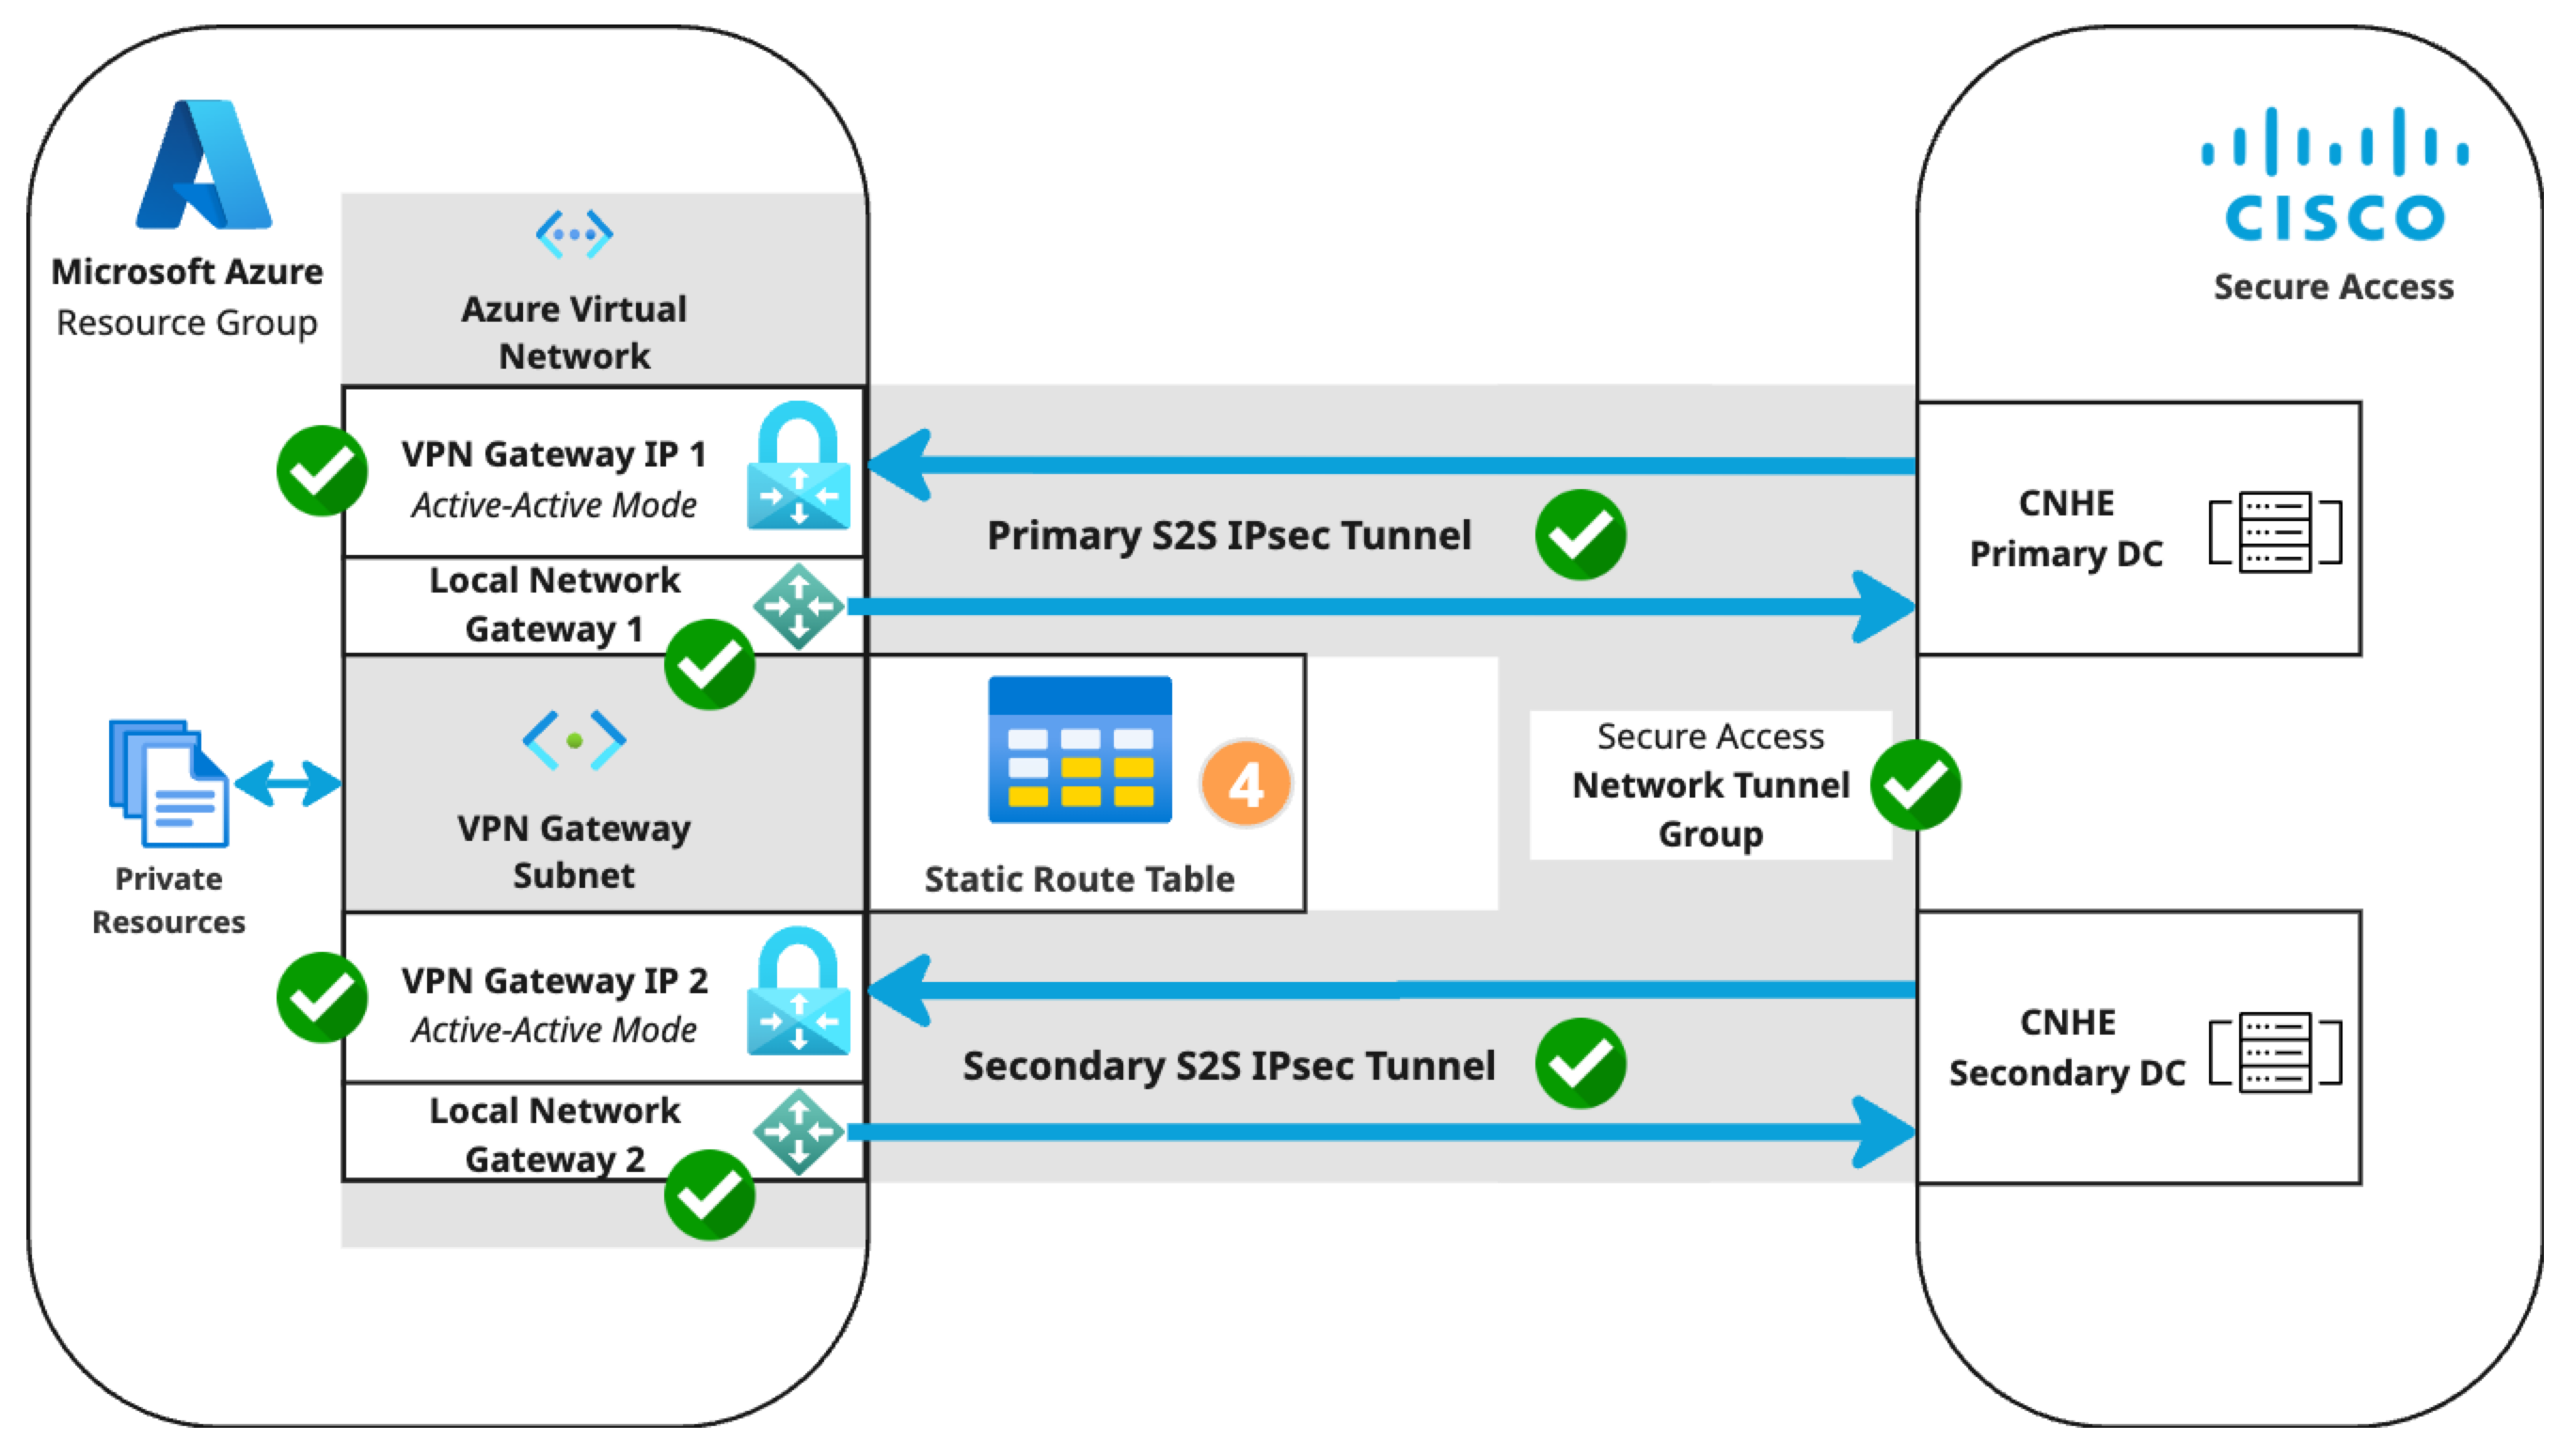
The CloudShell command returns the BGP peering addresses for the primary and secondary local network gateways.By creating a static route to the primary local network gateway connection, Azure will route all traffic to the primary DC via the primary S2S tunnel when both tunnels are up. When the primary tunnel is down, Azure will route all traffic to the secondary DC via the secondary S2S tunnel.
- Associate a subnet.
- Navigate to Settings > Subnets.
- Select the virtual network.
- Subnet: default.
- Click OK.

