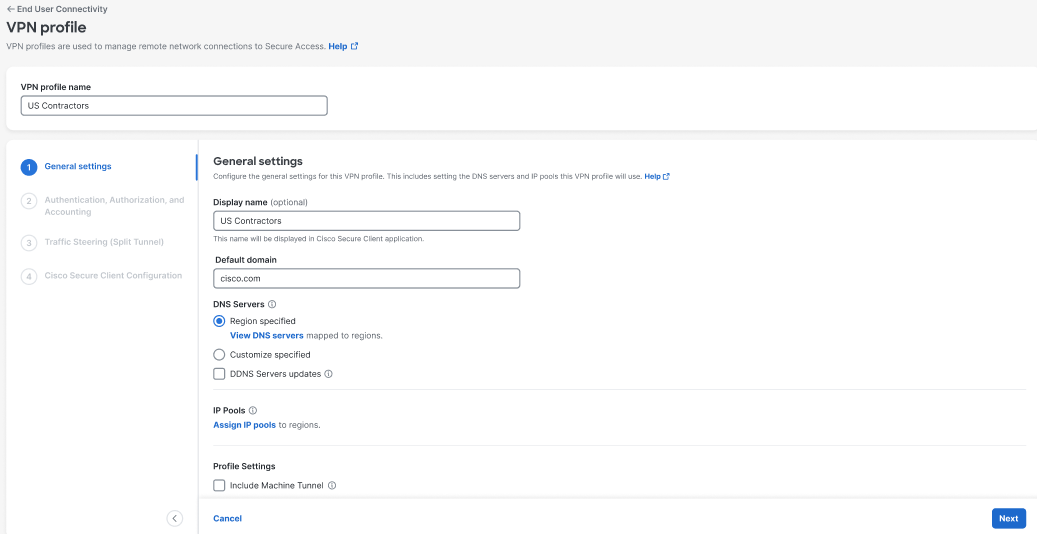
Step 1 – General Settings
Enter a name and configure the general settings that this VPN profile will use.
-
Navigate to Connect > End User Connectivity > Virtual Private Network.
-
For VPN Profiles, click + VPN Profile.
-
Enter a meaningful VPN profile name for this profile.
-
Enter an optional Display name for this profile. This is a customizable and flexible label that is displayed to end-users of the Cisco Secure Client for ease-of-selection when choosing the appropriate profile.
-
Enter the Default Domain.
-
Review the DNS Servers options.
- By default, the DNS Servers is set to Region specified, meaning that the VPN profile uses the DNS specified for the region.
- (Optional) Click View DNS servers to see the list of DNS servers mapped to regions.
- (Optional) To choose a DNS pair other than the default regional DNS, click Custom specified, then click Map DNS servers to open an configurable view of all available DNS servers for a VPN profile. For more information, see Map DNS Servers to Regions.
- (Optional) Check DDNS Servers updates to include dynamic updates to the mappings of domain names to IP addresses when a remote user's network IP address changes. By default, the DDNS Servers is set to Region specified, meaning that the VPN profile uses the DDNS specified for the region. For more information, see Map DDNS Servers to Regions.
-
Click Assign IP pools and select one IP pool per region from the IP Pools drop-down. VPN profiles must have at least one IP pool assigned in each region for a valid configuration. For more information, see Add an IP Pool.
-
Under Profile Settings, review the following settings and choose the options appropriate for this profile:
- Check Include machine tunnel for this profile to allow a client device to connect to Secure Access before a user initiates a login. Click + Add Machine Tunnel to configure a machine tunnel if one does not exist for this profile; see Manage Machine Tunnels for more information.
- Check Include regional FQDN to add a region-specific FQDN to the hostname, which provides flexibility to clients when connecting to their VPN headend.
-
Under IP version mode, select the mode(s) that this VPN profile will use:
- IPv4
- IPv6
-
Under Protocol, select the protocol(s) that this VPN profile will use:
- TLS/DTLS
- IKEv2
At least one protocol must be selected. If both TLS/DTLS and IKEv2 are selected, choose the primary protocol from the Primary drop-down.
-
Optionally, choose a Connect time posture from the drop-down. See Add a VPN Connection Posture Profile.
-
Click Next.
