Configure NAT Policy
If a NAT policy currently exists in the Secure Firewall device, this policy must be changed to exempt traffic going through the tunnel from being NATed. Secure Access requires the source of the connection to be the client's original private IP address — the public IP is not currently supported.
If you use the public IP in your internal network, you must NAT the traffic to a private IP address pool before sending the traffic to Secure Access, as most of the traffic goes through the Secure Access IPSec tunnel. It is easier to create NAT for the traffic not going through the tunnel and use no NAT for all other traffic.
In this example, the network object containing the Secure Access resolvers' IP address is referred to in the NAT statement. All traffic sourced from the internal network with a destination matching the network object will have the source IP NATed to the firewall interface address. All other traffic does not match the NAT statement, and so is forwarded to Secure Access without being NATed.
Procedure
| 1 |
In Cisco Secure Firewall Management Center, navigate to Devices > NAT > New Policy > Threat Defense NAT. |
||
| 2 |
Enter a name, then select the FTD device to apply the policy. Click Save. 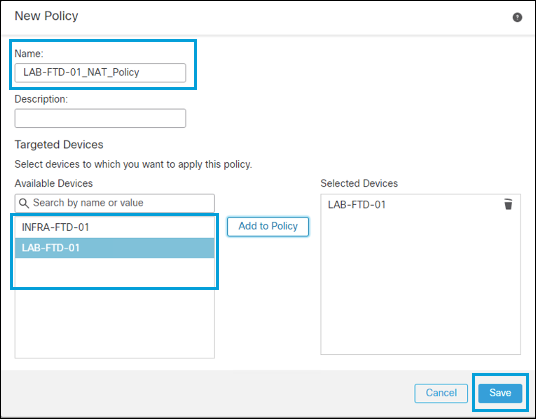
|
||
| 3 |
Click Add Rule. |
||
| 4 |
Select Manual for NAT Rule, then select Dynamic for type. In Interface Objects, choose Inside for the Source and Outside for Destination. 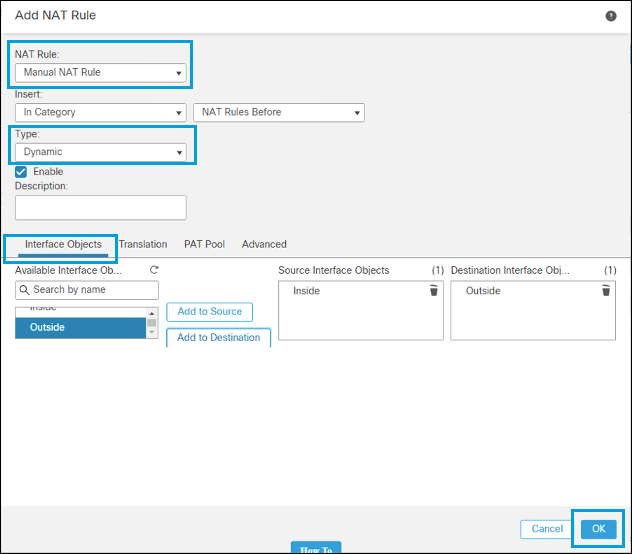
|
||
| 5 |
Under Translations, select a network object containing the internal subnet as the Original Source. Specify the Secure Access bypass network object you previously created as the Original Destination.
|
||
| 6 |
Select Destination Interface IP as the translated source, and the same object as the translated destination. This ensures that the internal network is NATed to the interface IP address only when the destination is the network object containing the resolver's IP address. Other destinations do not match the NAT statement. 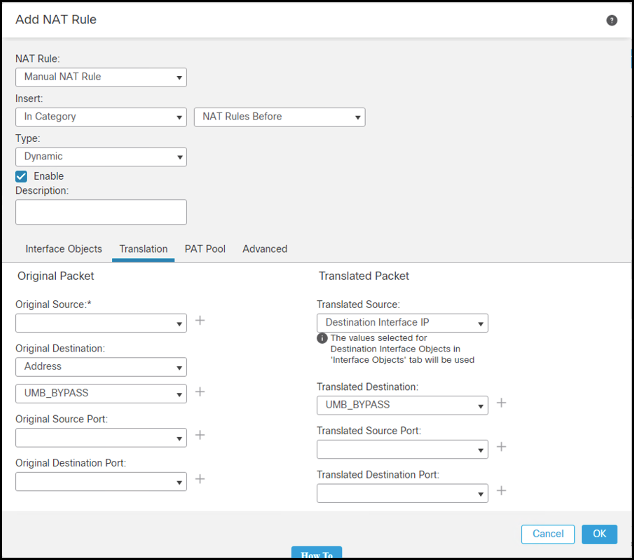
|
||
| 7 |
Click OK, and then click Save. The NAT policy is configured. 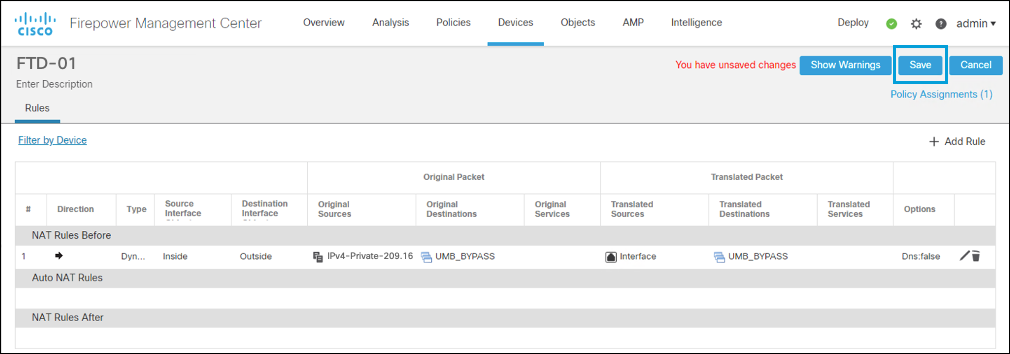
|