Step 2 – Configure the Network Resource
Before you begin, determine if you have an IPv4 dynamic IP address. Secure Access only supports dynamic IP addresses for IPv4. Most home, small school, and small business networks are provisioned typically by Internet Service Providers (ISPs) with a dynamic IP address (IPv4) when defining each unique internet network.
|
|
If possible, add the network resource from the IP address used to sign into Secure Access.
Otherwise, Secure Access sends an email to the user account and requires that you visit a link
from the IP address of the network that you are registering.
|
- Navigate to and click Add.
- Give your network resource a descriptive Network Name.
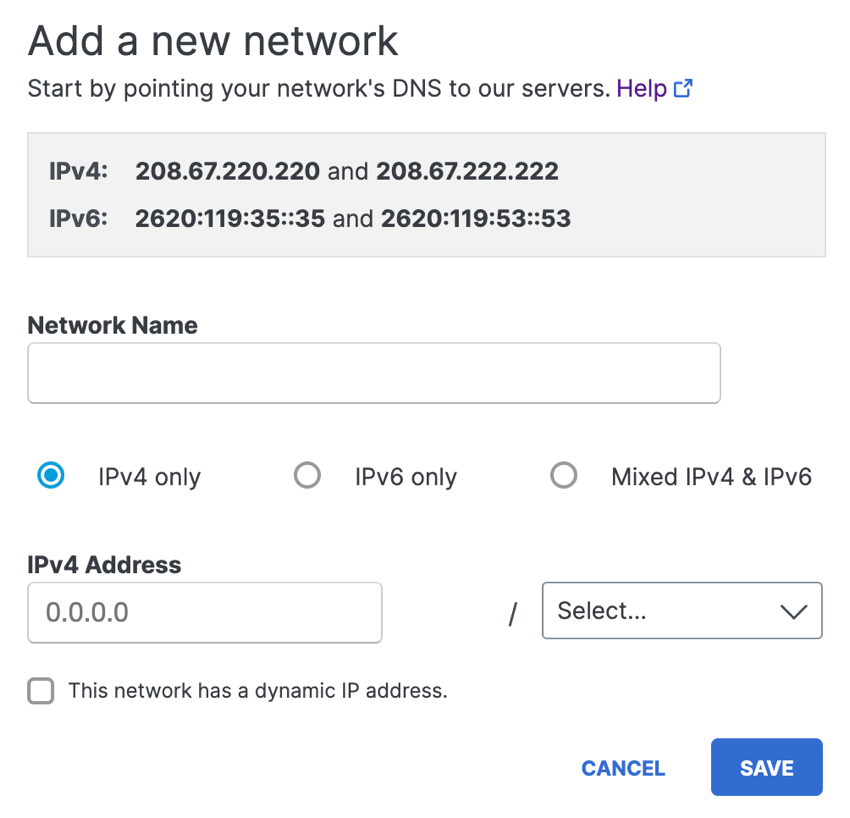
- Choose an internet protocol: IPv4, IPv6, or Mixed IPv4 & IPv6 .Select a protocol based on the IP address where you have configured your router.
- Add the network's IP address and choose a subnet mask.
- For IPv4 only, if you have a dynamic IP address, check This network has a dynamic IP address.
- Click Save.
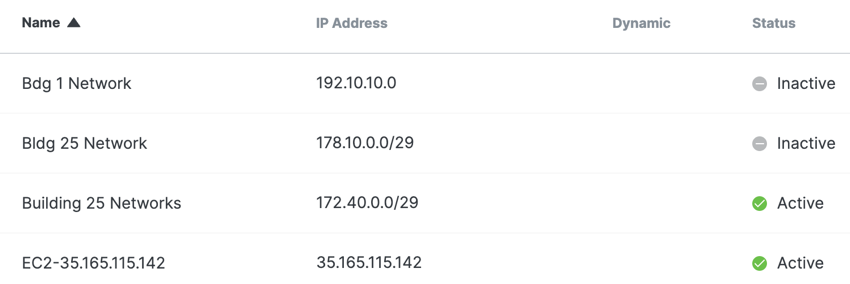
Once Secure Access validates your IP address, the network resource is listed at Resources > Registered Networks. Initially, Secure Access lists the status of your network as Inactive. When Secure Access receives DNS traffic from the network, the network resource's status changes to Active.