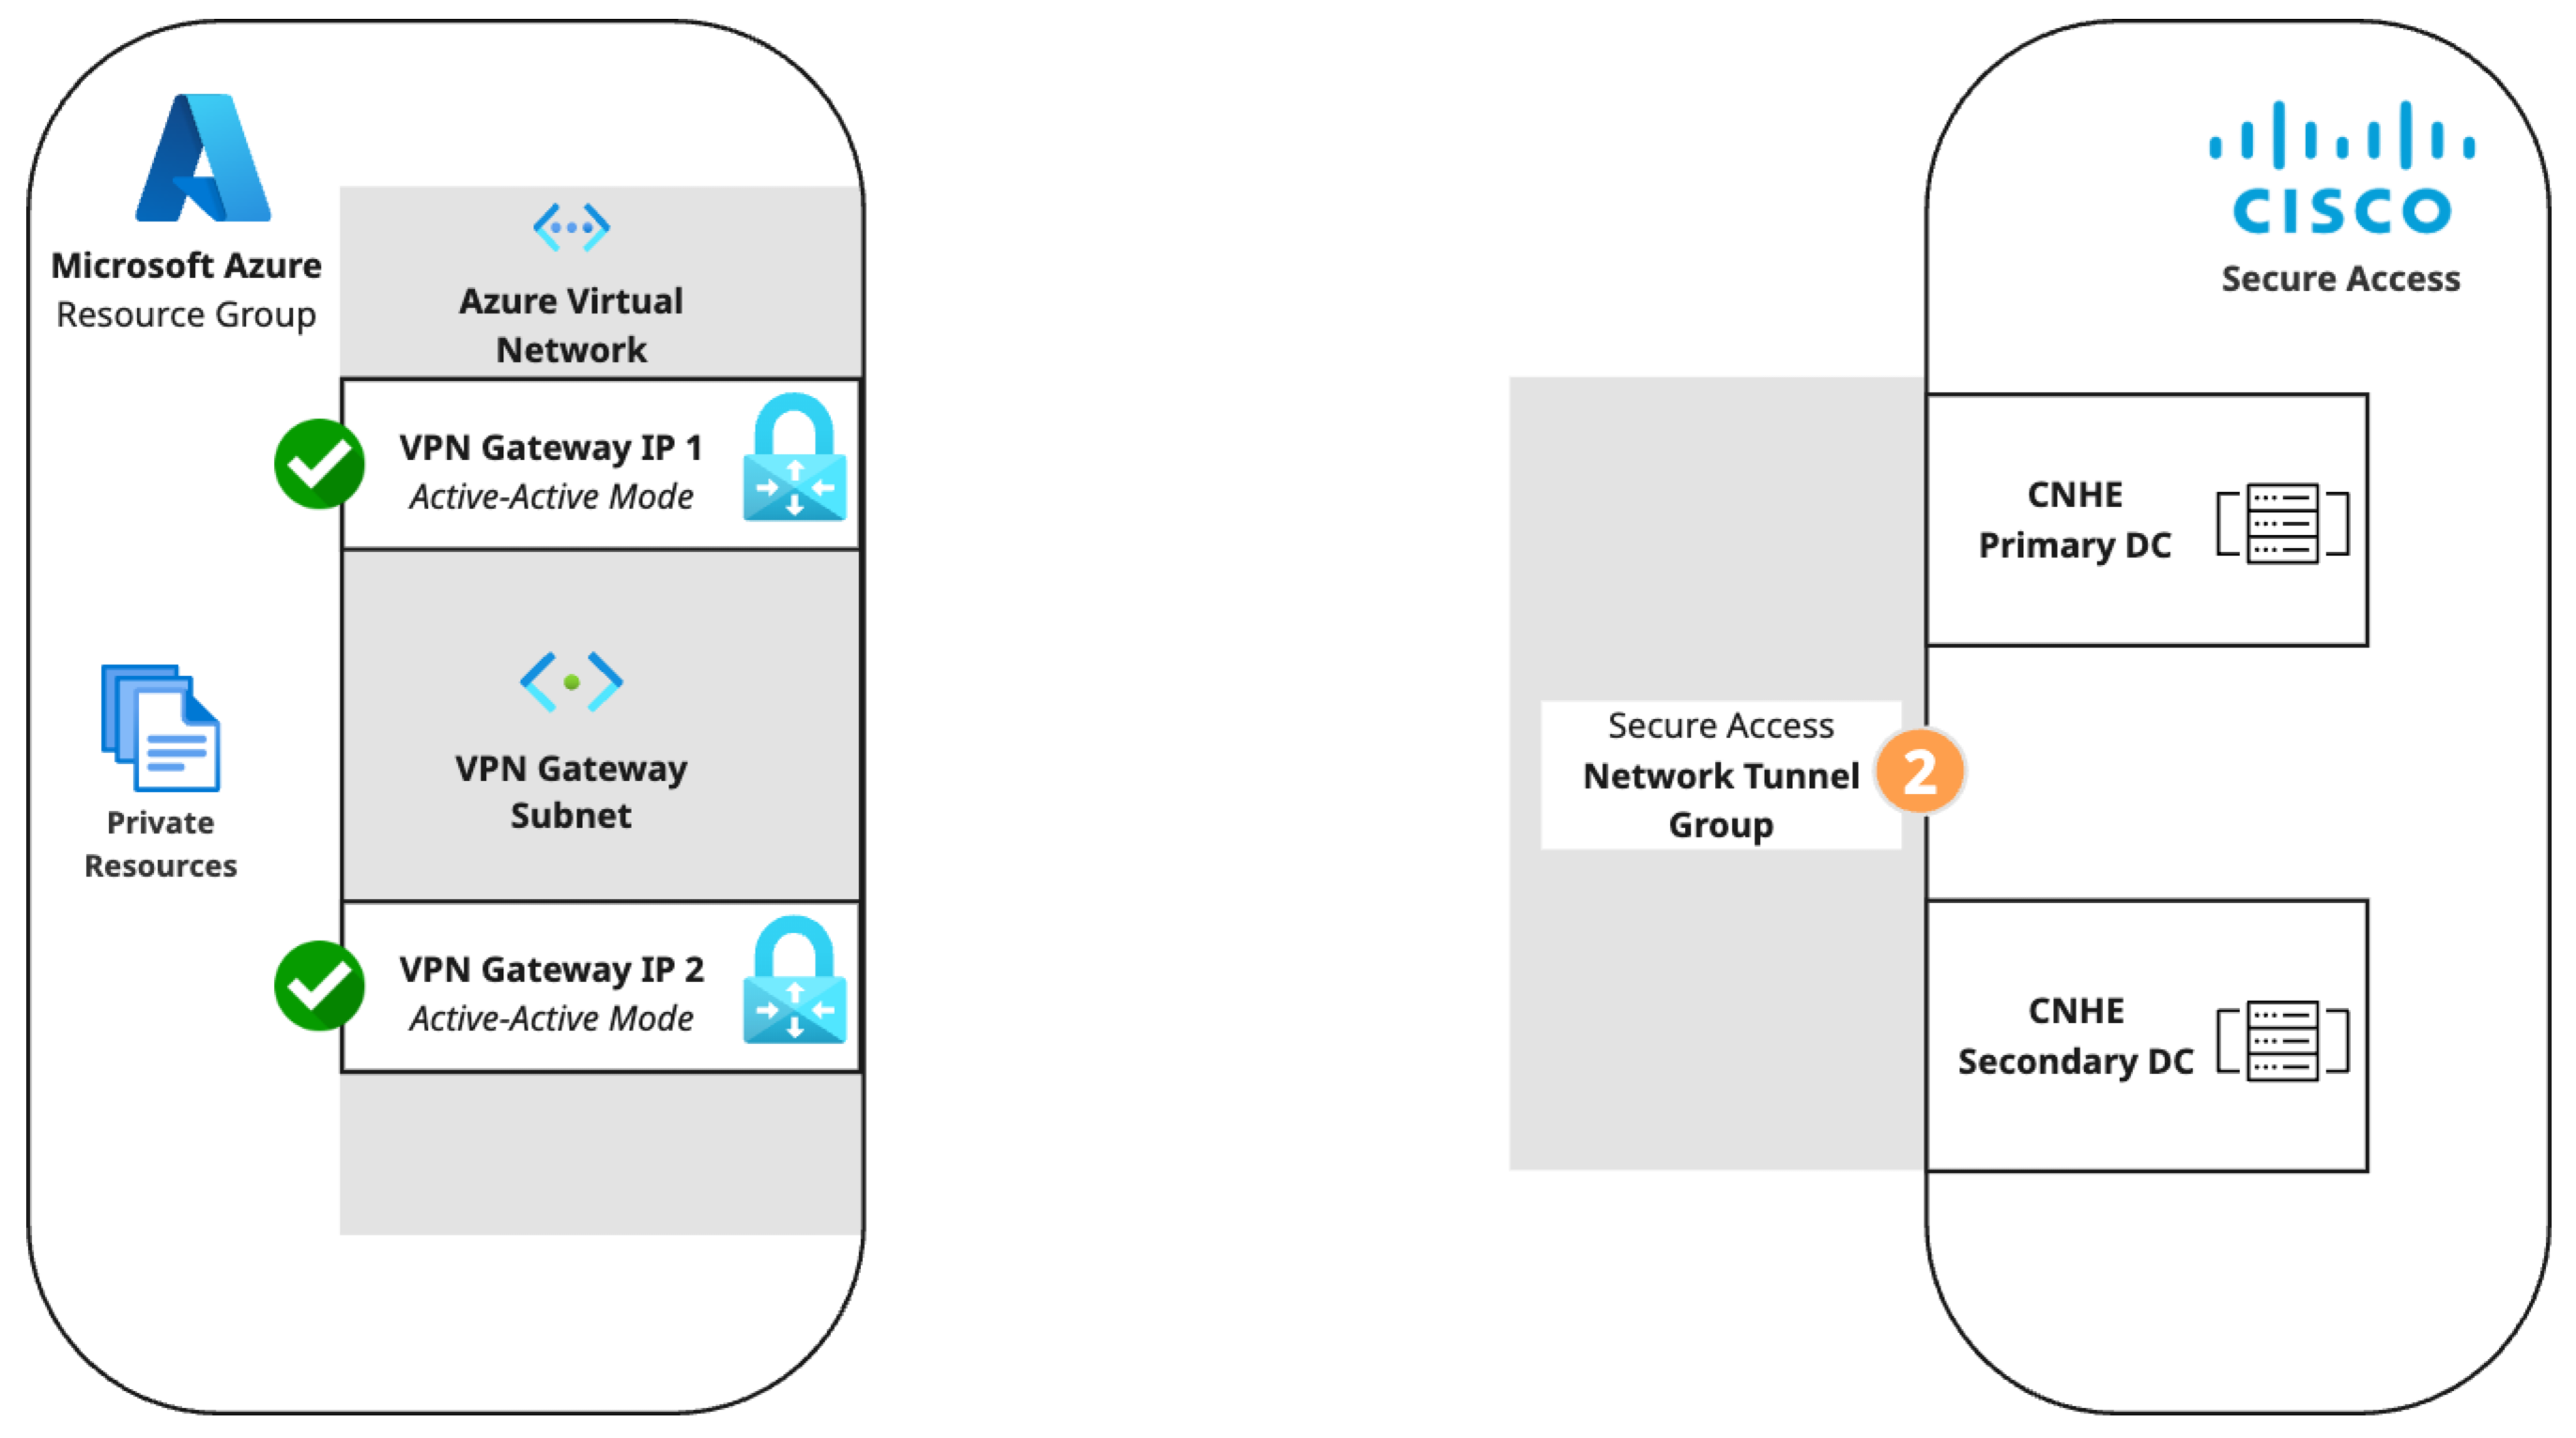
Step 2: Create a network tunnel group in Secure Access
Create a network tunnel group in Secure Access with the following configuration. For a more detailed procedure, see Add a Network Tunnel Group.
- Step 1 - General Settings: Set Device Type to AZURE.
- Step 2 - Tunnel ID and Passphrase: Enter the primary and secondary public IPs from the Azure virtual network gateway and create a passphrase.
-
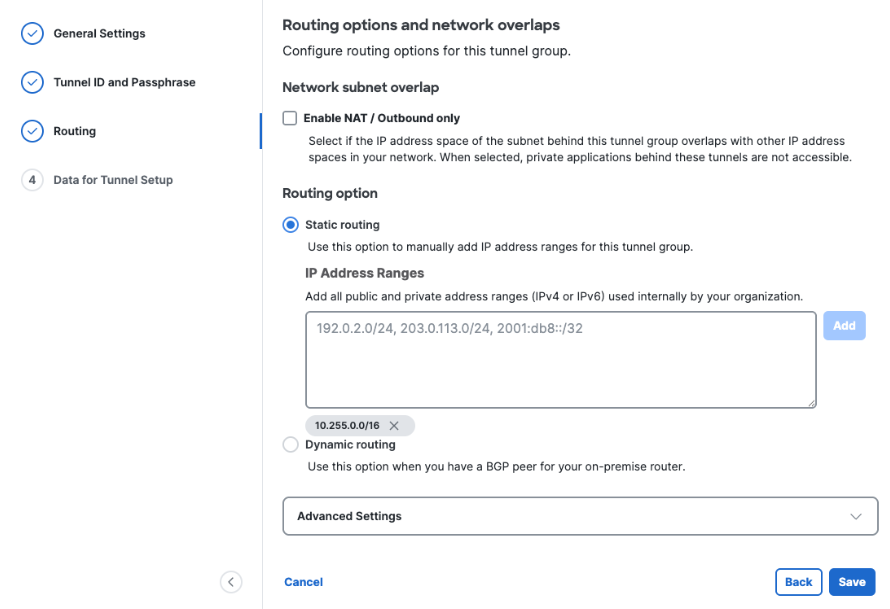
Step 3 - Routing
- Option 1, Enable NAT / Outbound only: Enable NAT / Outbound only if you determine that the IP address space behind the tunnel group overlaps with other IP address spaces in your network.

Enabling NAT for outbound traffic disables the routing options described below. Private applications hosted behind these tunnels will not be accessible. - Option 2, Static routing: Add all public and private IPv4 address ranges used internally for your Azure virtual network. This example uses the range 10.255.0.0/16.
- Option 1, Enable NAT / Outbound only: Enable NAT / Outbound only if you determine that the IP address space behind the tunnel group overlaps with other IP address spaces in your network.
-
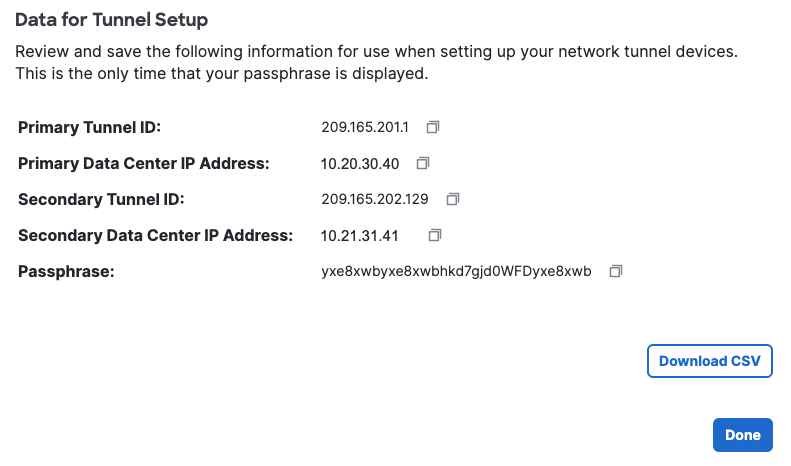
Step 4 - Data for Tunnel Setup: Copy or download the primary and secondary tunnel IDs, data center (DC) IP addresses, and the passphrase you created.
This is the only time your passphrase will be displayed.