Assign an IP Pool
To assign an IP address pool to a VPN profile, complete the following steps:
-
Navigate to Connect > End User Connectivity > Virtual Private Network.
-
For VPN Profiles, click on a profile to modify or click + VPN Profile to add a new profile.
-
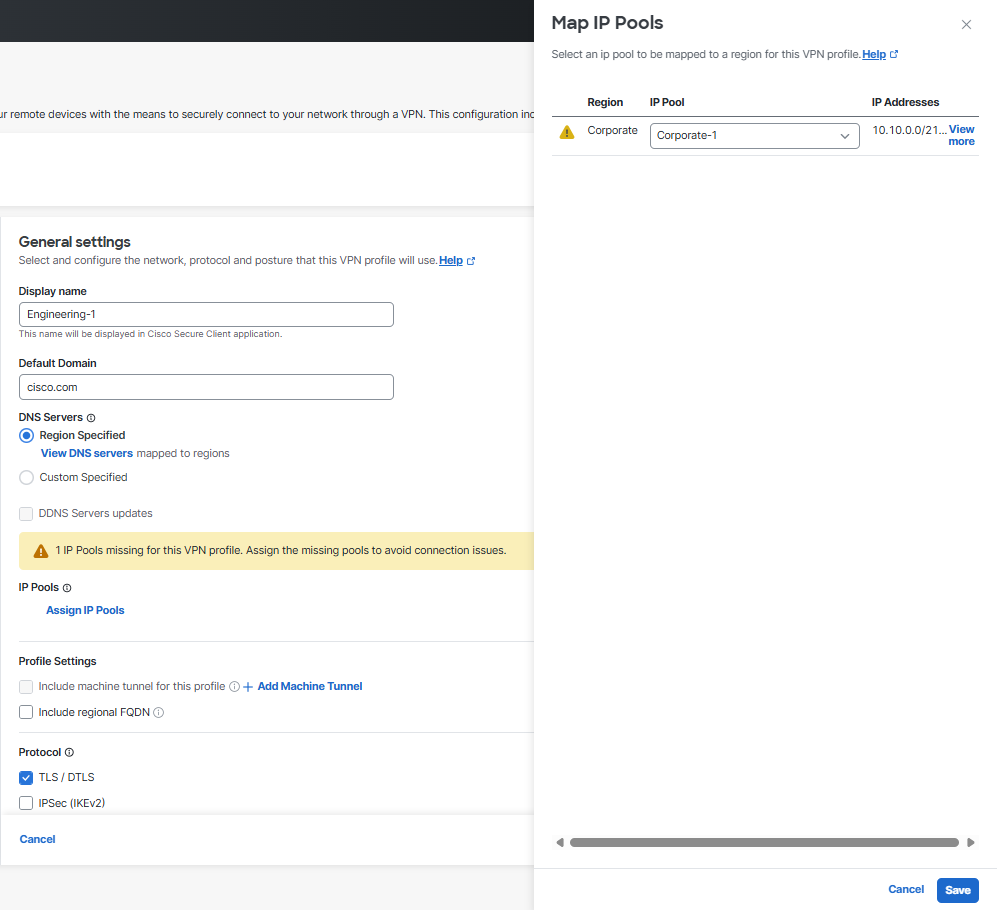
Under General Settings, click Assign IP Pools and select one IP pool per region from the IP Pool drop-down. VPN profiles must have at least one IP pool assigned in each region for a valid configuration. For more information, see Add an IP Pool.

-
Click Save to assign the IP pool to the VPN profile and to clear the alert.

