Step 3c – Add the Azure SAML Metadata to Secure Access
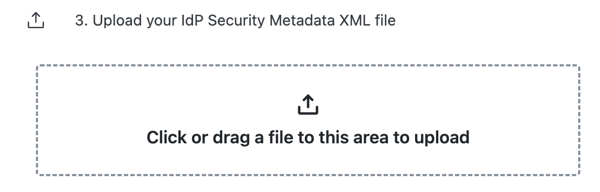
If you used SAML Metadata XML Configuration in step 3a above, upload your configured Entra ID SAML Metadata XML file to Secure Access, then click Done.
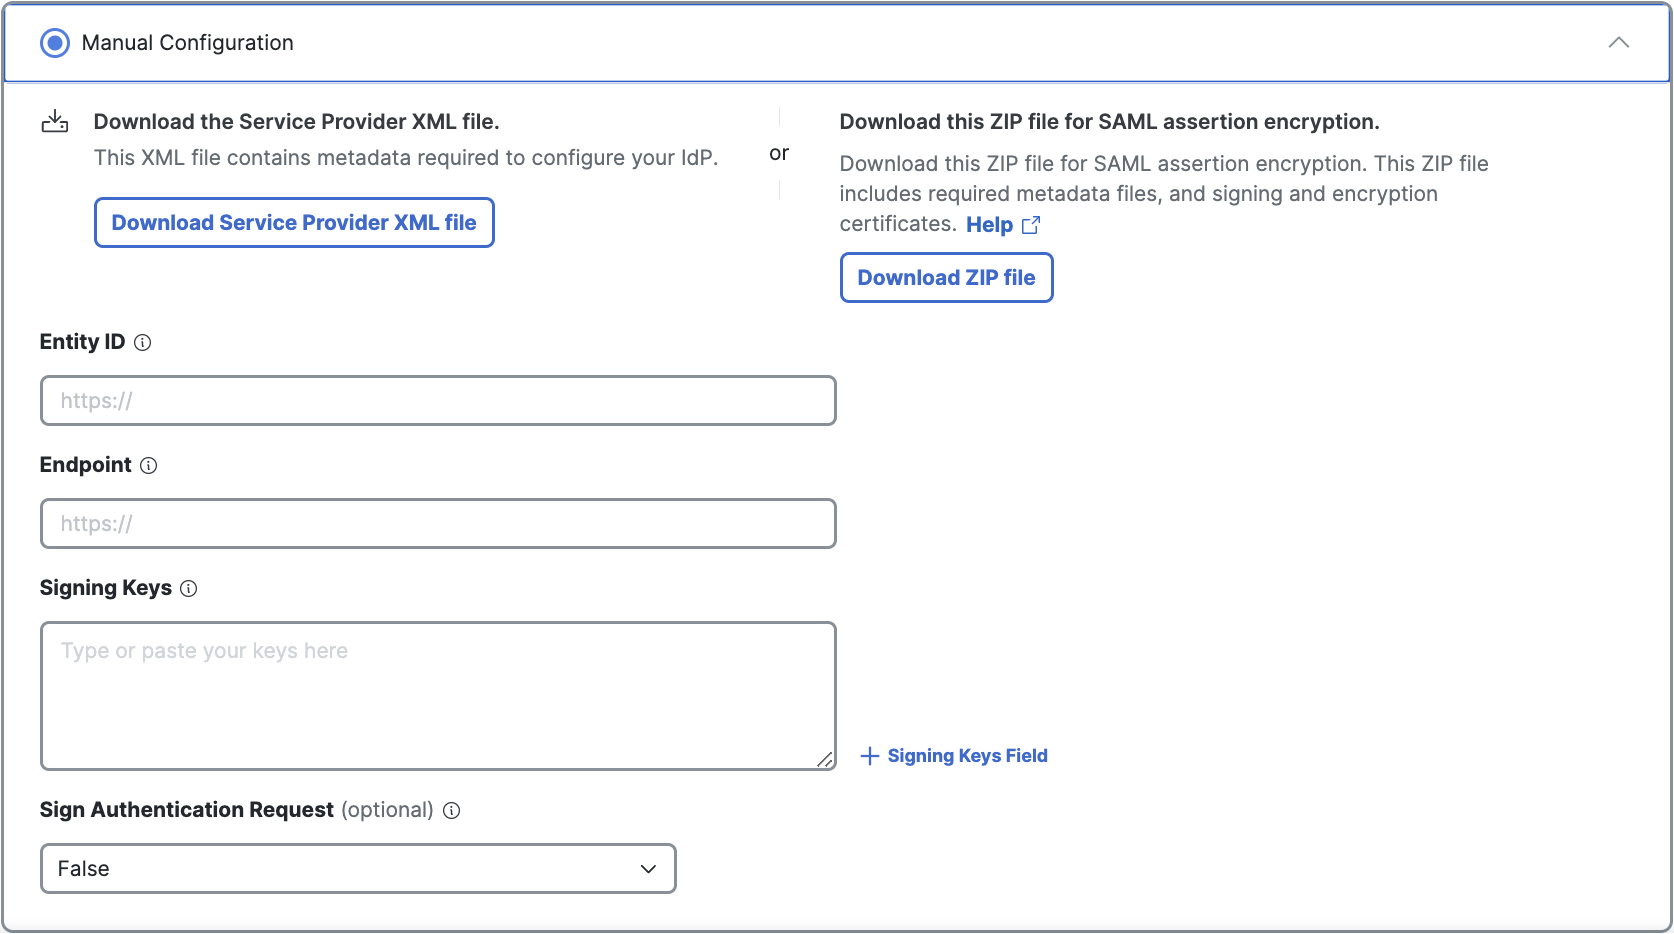
If you used Manual Configuration in Step 3a above, enter your Entra ID SAML metadata for the following Secure Access settings:
- Entity ID—A globally unique name for an identity provider.
- Endpoint—The URL used to communicate with your identity provider.
- Signing Keys—Your identity provider's x.509 certificate that is used to sign the authentication request.
- Signed Authentication Request (optional)—Choose whether to sign the authentication request for the IdP.
- On Entra ID, copy the value of Microsoft Entra Identifier. Navigate to Secure Access and and enter the value in Entity ID .
- On Entra ID, copy the value of Login URL. Navigate to Secure Access and enter the value in Endpoint.
- On Entra ID, Copy the value of Signing Certificate. Navigate to Secure Access and enter the value in Signing Keys.
- (Optional) Navigate to Secure Access and choose whether to sign the authentication request.
- On Secure Access, click Done.