Step 1: Create a VPN Gateway in Microsoft Azure
The Azure S2S IPsec tunnel is sourced from the VPN Gateway. If you have already deployed a VPN Gateway in your Azure environment, you can skip this section.
- In the Azure admin portal, navigate to your resource group and click Create.
- Search the marketplace for Virtual network, then click Create.
- Configure the virtual network.
-
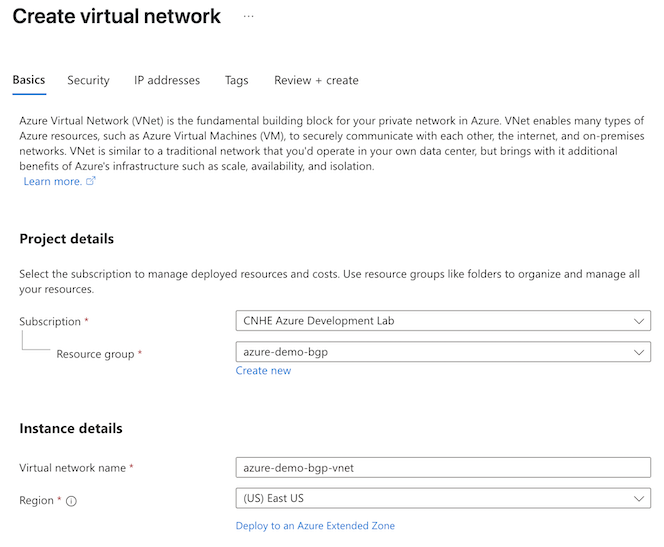
Basics: Select the Subscription and Resource group with the resources that you want to make available via the S2S VPN tunnel.
-
IP addresses: Configure a virtual network address with the IPv4 and IPv6 addresses and subnets you need. This example uses the range 192.168.0.0/16.
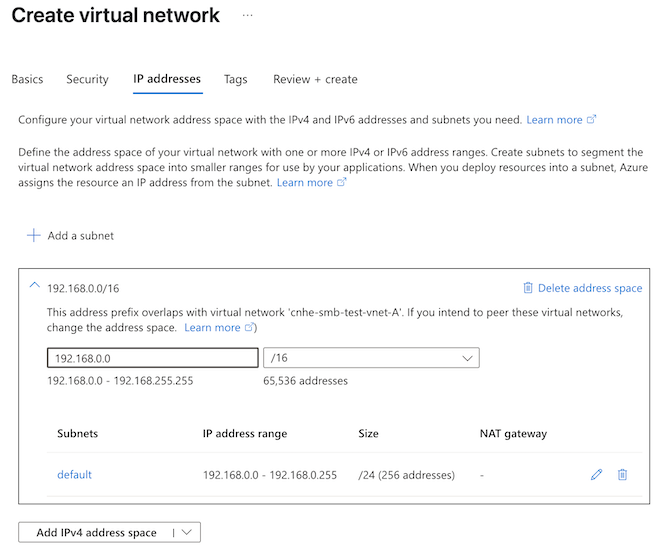
-
Review the configuration and click Create. Azure will deploy the virtual network and update the dashboard when deployment is complete.
-
- Create the gateway subnet.
- Navigate to Go to resource > Settings > Subnets.
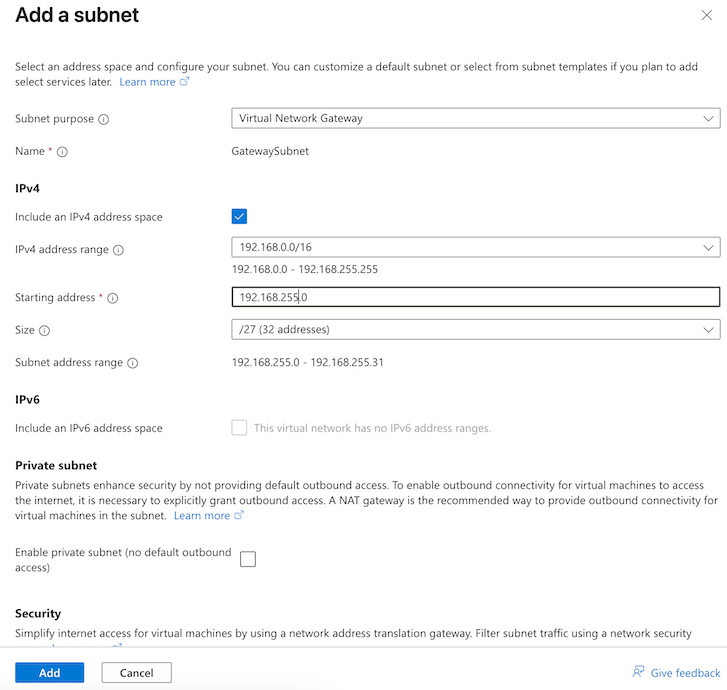
- Click + Subnet and configure the following:
- Subnet purpose: Virtual Network Gateway.
- Enable Include an IPv4 address space (it is enabled by default).
- IPv4 address range will default to the address space you configured when you created the virtual network. This example uses the range 192.168.0.0/16.
- Starting address: This example uses 192.168.255.0.
- Size: This example uses /27 (32 addresses)
- Click Add.
- Create the virtual network gateway.
- Navigate to Overview > Resource group (click the name of your resource group) > + Create.
- Search the marketplace for Virtual network gateway, then click Create.
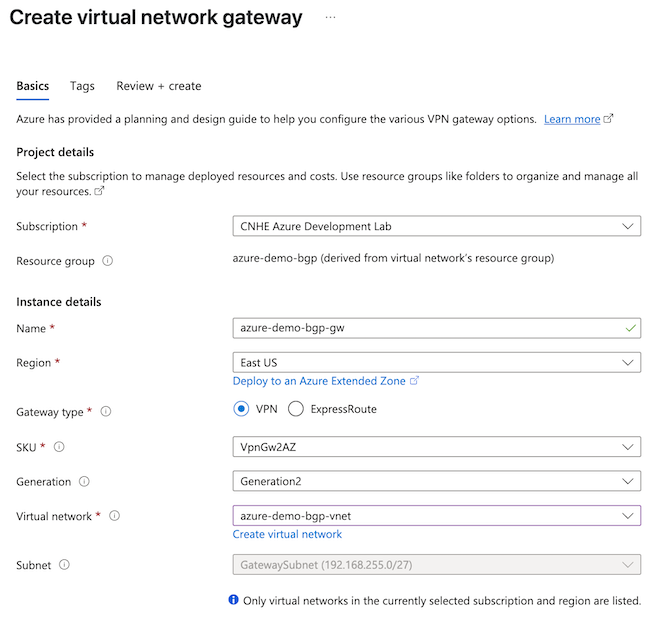
- Configure the virtual network gateway.
- SKU: VpnGw2AZ. For more information, see About gateway SKUs.
- Generation: Generation2.
- Virtual network: Select the virtual network you created in the previous step.
-
Public IP address: Create new.
- Public IP address name: Enter a descriptive name for the primary IP address.
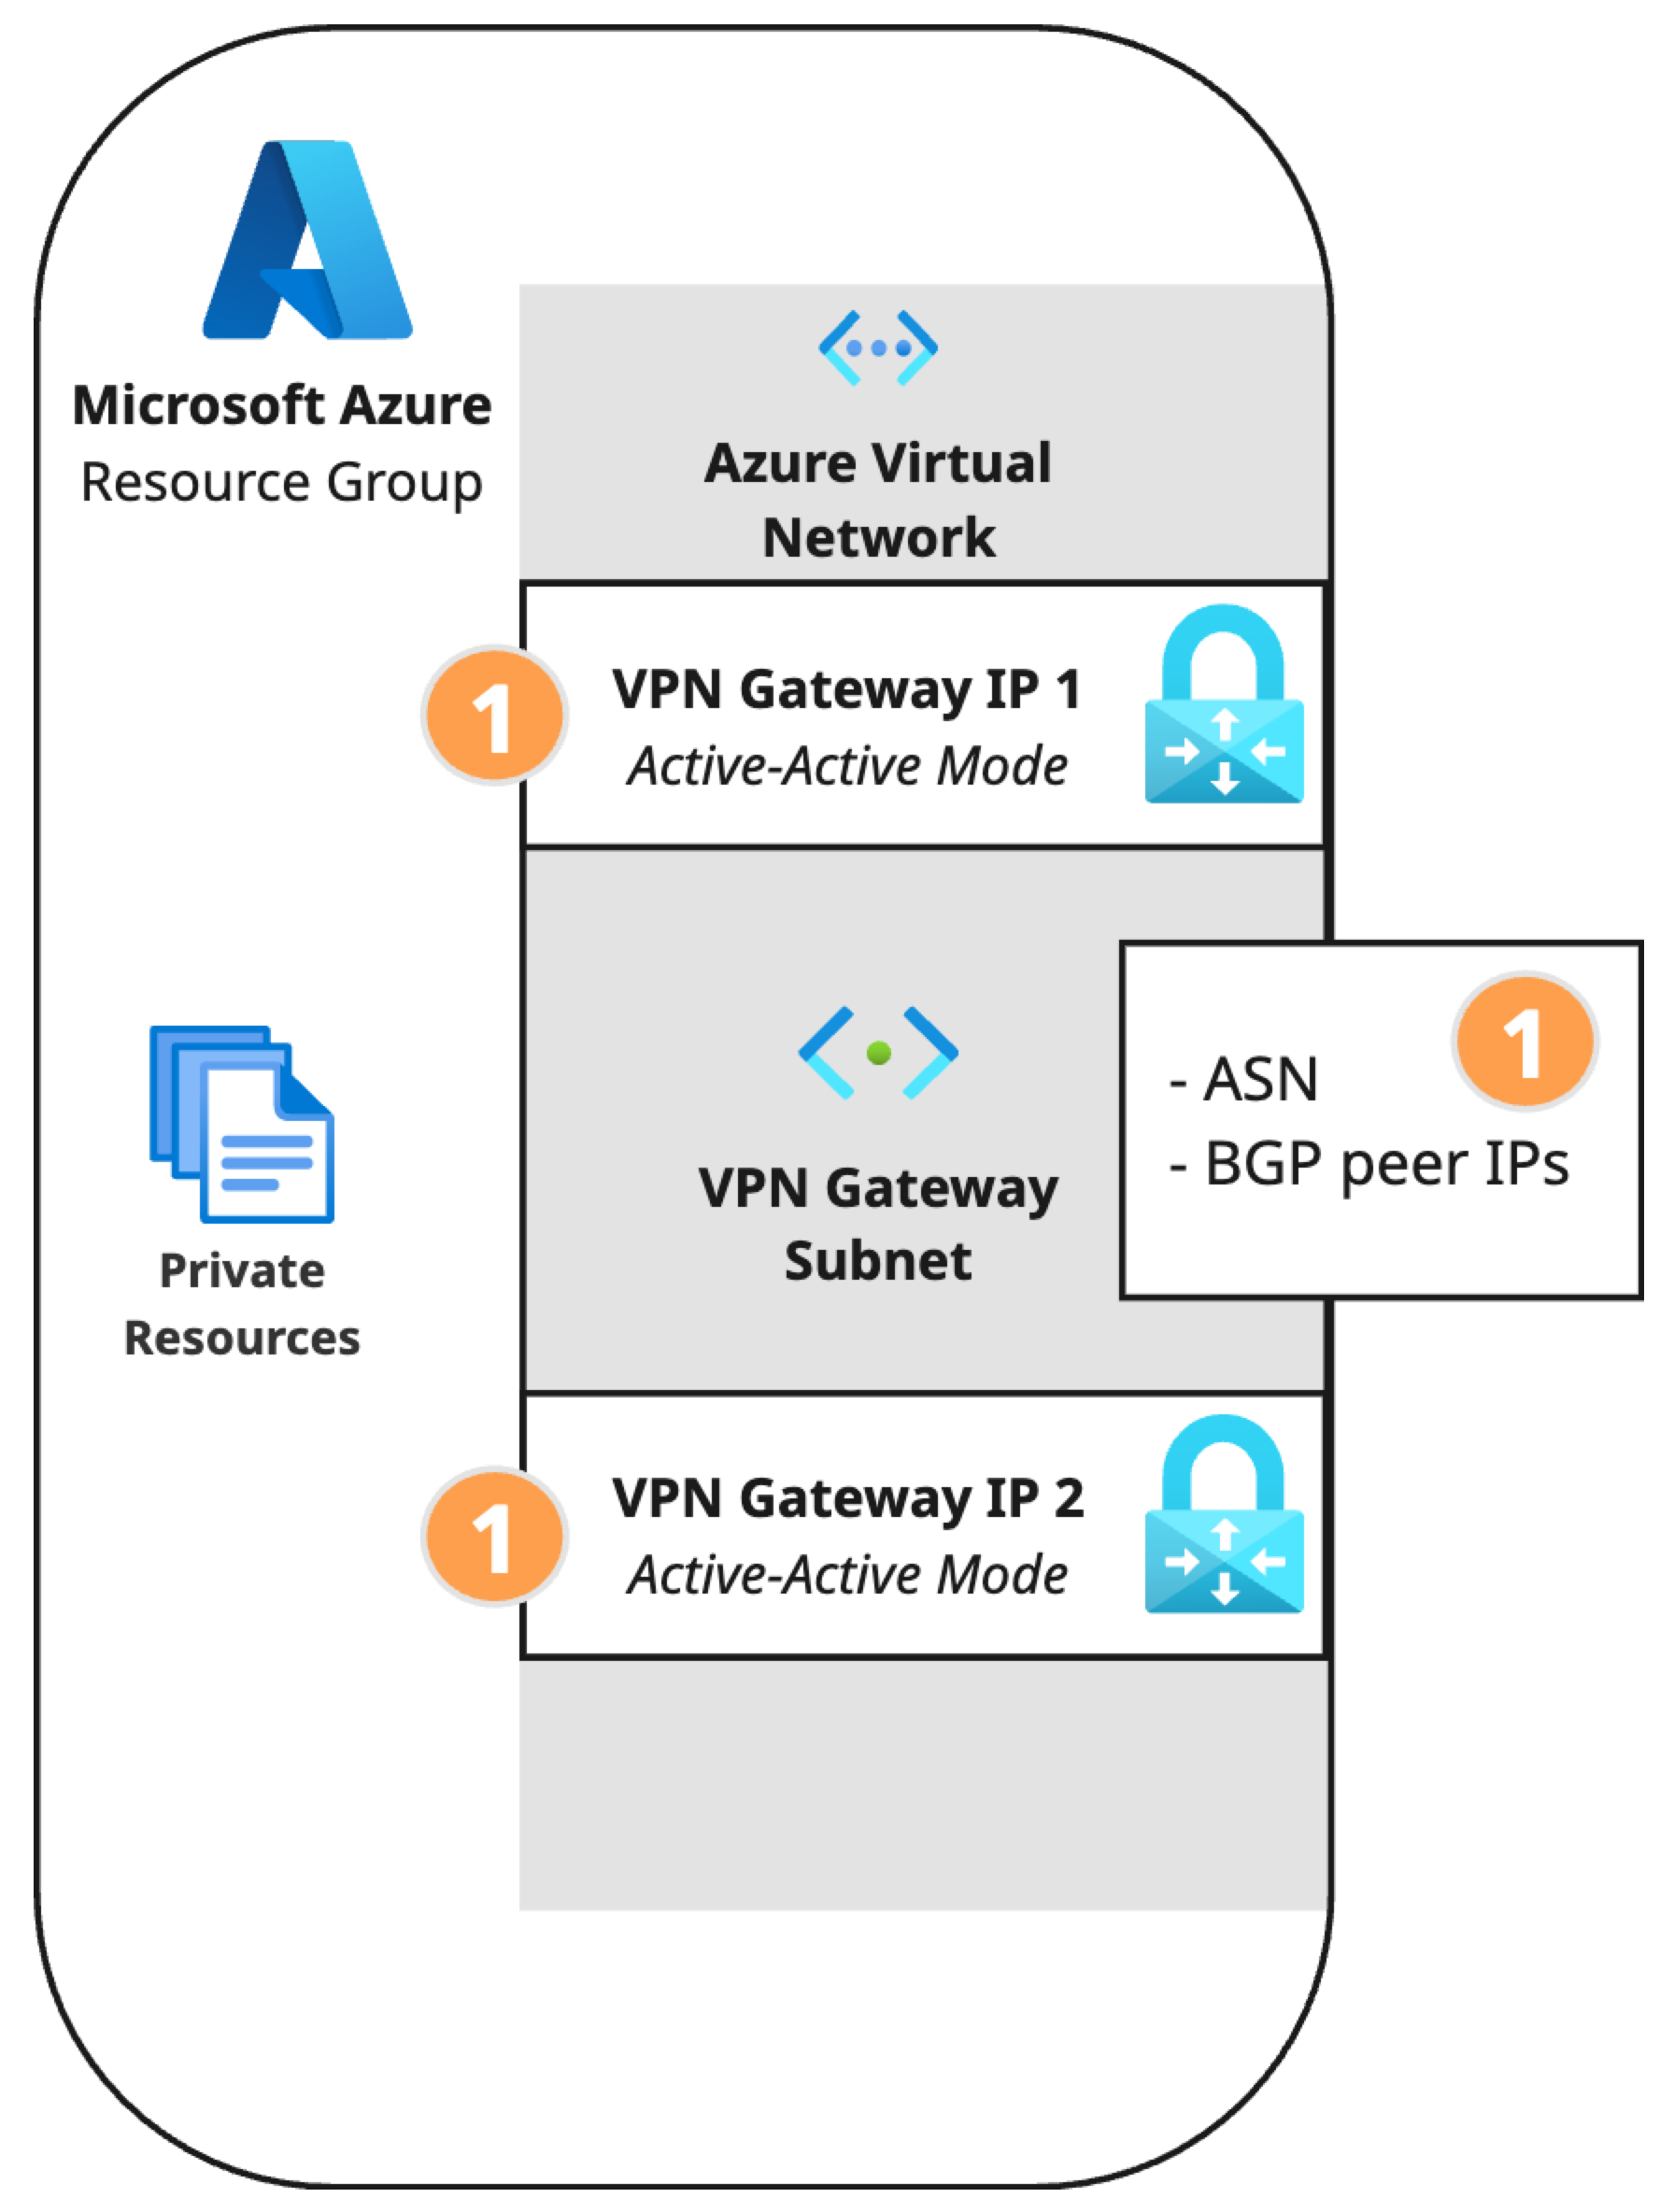
- Enable active-active mode: Enabled.
-
SECOND PUBLIC IP ADDRESS: Create new
- Public IP address name: Enter a descriptive name for the primary IP address.
- Configure BGP: Enabled.
- Autonomous system number (ASN): Enter an ASN that is not in use by your other branches and that is not reserved by Azure or IANA. For more information, see Microsoft Azure documentation on BGP and routing. This example uses ASN 64515.
- You do not need to enter custom Azure APIPA BGP IP addresses.

-
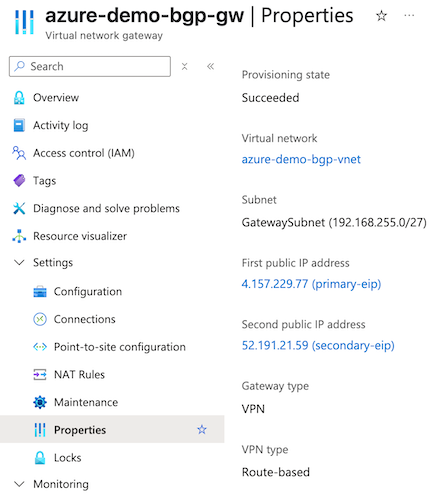
Review the configuration, then click Create. Azure will deploy the virtual network gateway and update the dashboard with the two public IP address resources when deployment is complete.
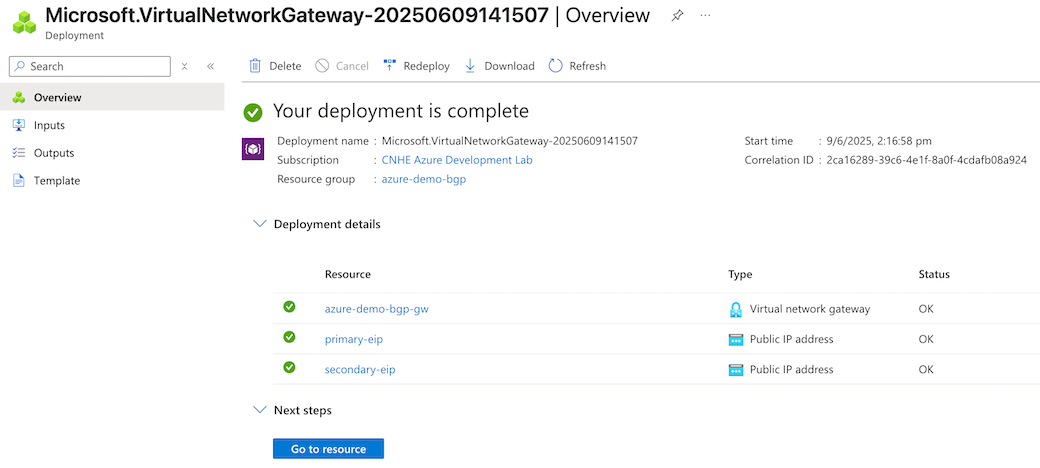
-
To review your configuration after deployment is complete, navigate to Settings > Properties.