Procedure
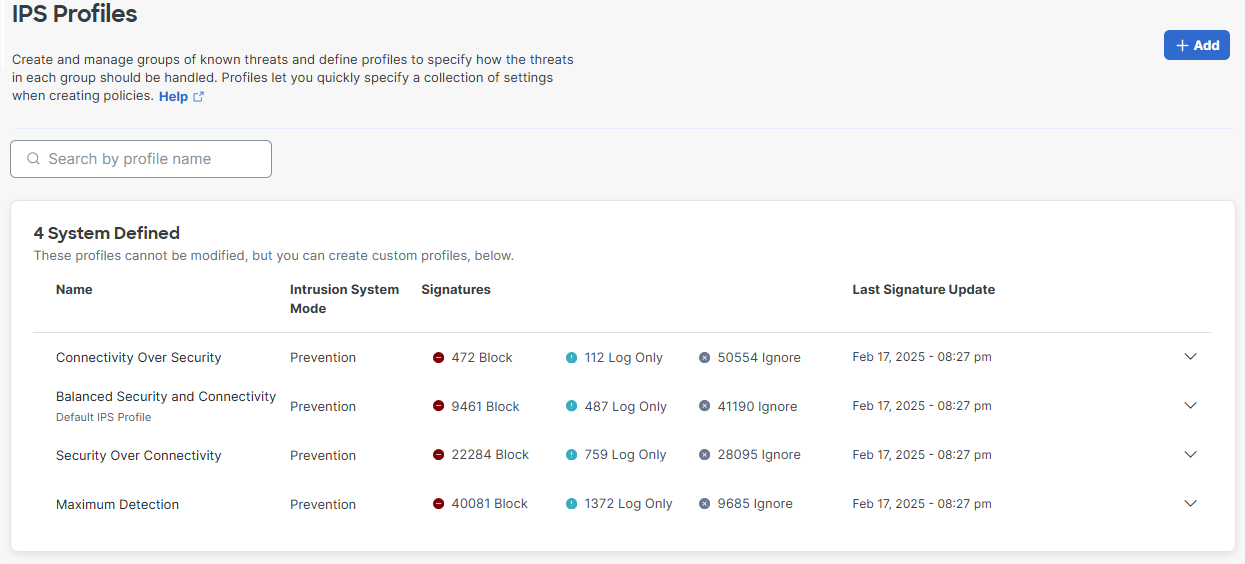
- Navigate to Secure > Profiles > IPS Profiles.

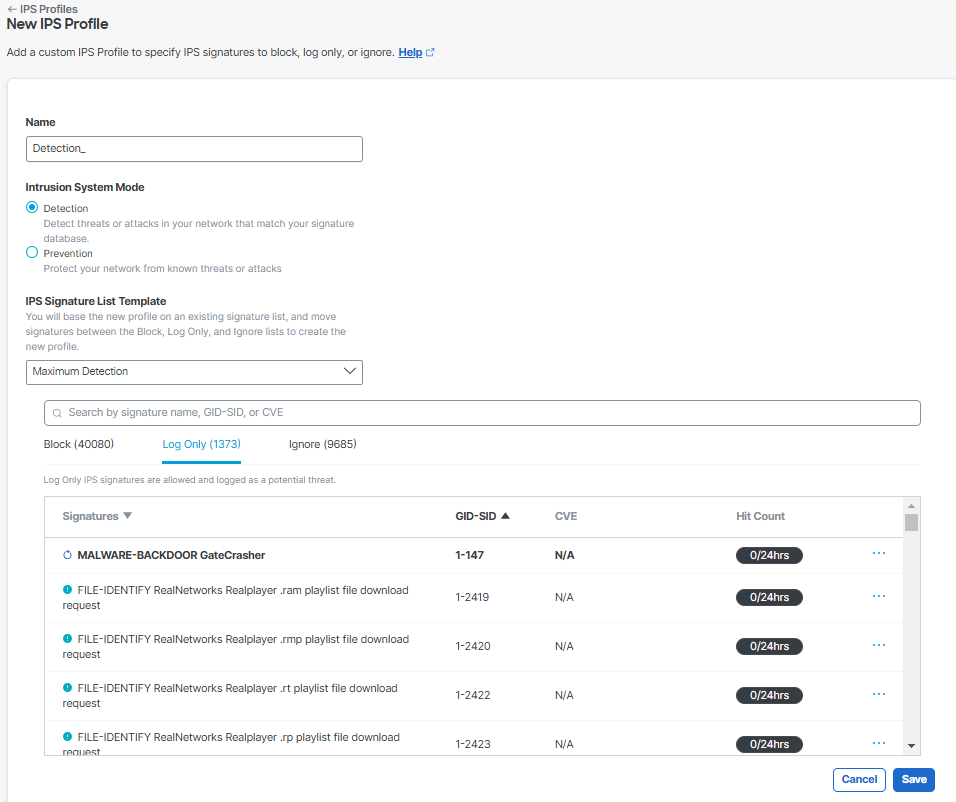
- Click Add and enter a name for your custom signature list and choose either
Detection or Prevention for Intrusion System Mode.
- Detection—Detect threats or attacks in your network that match your signature database. When Detection Only mode is used, your IPS settings can be tested on your network without affecting traffic. Signatures that would be blocked in Protection mode will be logged in Activity Search as "Allowed (Would Block)" under IPS Signatures.
- Prevention—Protect your network from known threats or attacks.
- Under IPS Signature List Template, choose the signature list to apply these settings to.
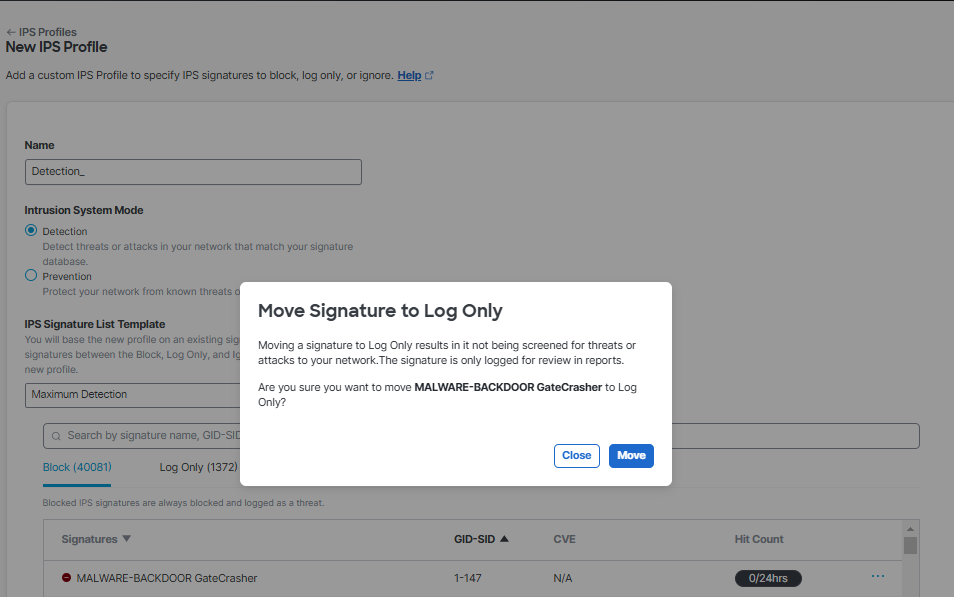
- Change which signatures are blocked, logged only, or ignored. Click the menu next to the
signature you want to move and click Move to Block, Move to Log Only, or
Move to Ignore. A prompt appears asking you to confirm your choice.


- Click Move. The signature you moved is now within the section you chose.

- Click Save to finish creating your custom signature list.


