Procedure
The following procedure describes how to map DNS servers configured in regions across your Secure Access organization. DNS settings are part of the General settings when setting up VPN profiles, thus this procedure covers only a subset of the VPN profile set up. For more information, see:
- Add VPN Profiles for the complete VPN profile procedure.
- Step 1 – General Settings for how DNS settings are applied in the VPN profile's general settings.
-
Navigate to Connect > End User Connectivity > Virtual Private Network.
-
For VPN Profiles, click + VPN Profile.
-
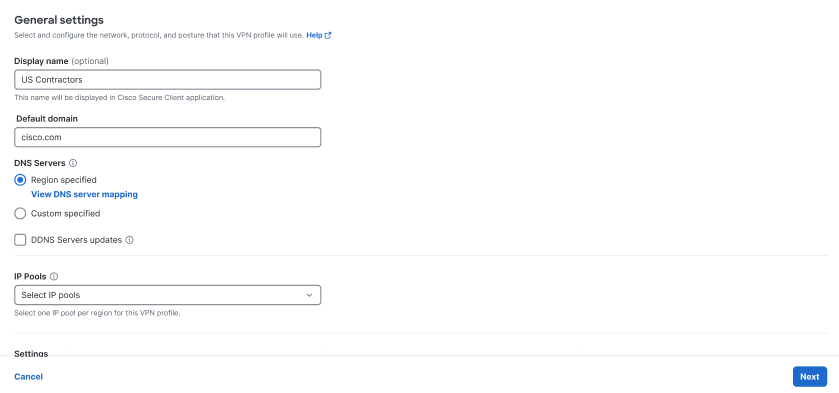
Enter a meaningful VPN profile name for this profile.
-
Enter an optional Display name for this profile. This is a customizable and flexible label that is displayed to end-users of the Cisco Secure Client for ease-of-selection when choosing the appropriate profile.
-
Enter the Default Domain.
-
Review the DNS Servers options.
-
By default, the DNS Servers is set to Region specified, meaning that the VPN profile uses the DNS specified for the region.
-
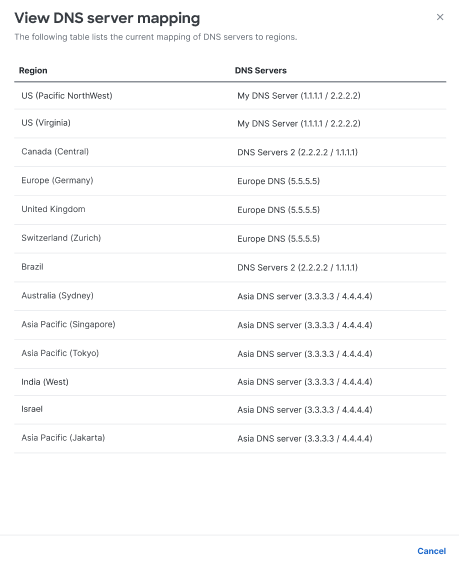
Click View DNS servers to see the list of DNS servers mapped to regions.
-
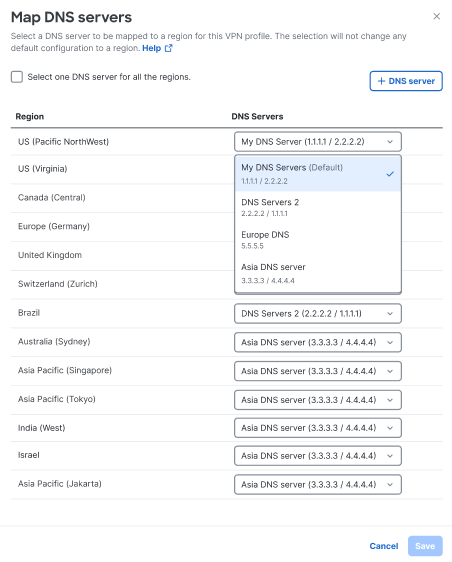
(Optional) To choose a DNS pair other than the default regional DNS, click Custom specified, then click Map DNS servers to open an configurable view of all available DNS servers for a VPN profile.
-
(Optional) Use the DNS Servers drop-downs to map any DNS server changes for a corresponding Region . Click Save to change the DNS settings, or click Cancel to exit.
-
(Optional) To choose one DNS pair for all regions, check Select one DNS server for all the regions.
-
(Optional) Select a DNS server pair from the available drop-down list to be applied to all regions. Optionally, click + DNS server to configure a new DNS server option. See Manage DNS Servers for more information.
-
(Optional) Click Save to change the DNS settings, or click Cancel to exit.
-


