Add a DDNS Server Group
The following procedure describes how to add a DDNS server group managed by Secure Access.
- Navigate to .

-
Click + Add.

-
Enter a label for the DDNS server group name; for DDNS Server 1 provide the IP address of the primary DDNS server. If you have a secondary DDNS server, add an IP address for DDNS Server 2.

-
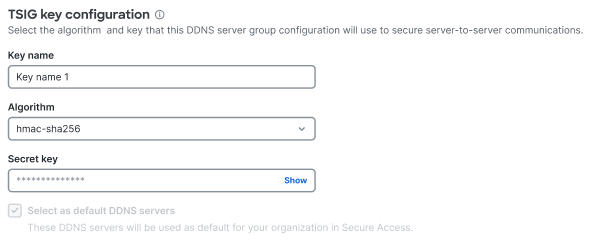
Enter the TSIG key configuration for this DDNS server group. Enter a label for the Key name and select the Algorithm to use, and the enter the Secret key.
TSIG (transaction signature) key configuration (defined in RFC 2845) enables the DNS to authenticate updates to a DNS database. It is most commonly used to update Dynamic DNS or a secondary DNS server.
- Click Save.


