Procedure
To define a network as trusted, perform the following steps:
-
In Secure Access, navigate to .
-
In the Default Profile section, click Manage Trusted Networks.
-
Click + Trusted Network to add the first network. (After the first network is added, the + Add option is displayed for adding additional networks.)

-
In the Trusted Network Name field, enter a name for the trusted network.
-
In the Inspect section, click one of the following radio buttons:
- Physical adapters: This ensures that TND inspects only physical network interfaces in an endpoint.
-
Physical and virtual adapters: This ensures that TND inspects both physical and virtual network interfaces in an endpoint.

The Physical and virtual adapters option is a beta feature intended for limited testing. You must not use this option in production environments.
-
From the Criterion drop-down list, select one of the following options:
-
DNS Servers: If you choose this option, enter all the DNS server addresses (comma separated) for the trusted network in the adjacent DNS Servers field. Cisco Secure Client detects a trusted network only if it matches any of the specified DNS servers.

-
DNS Domains: If you choose this option, enter the DNS domain suffixes (comma separated) for the trusted network in the adjacent DNS Domains field. Cisco Secure Client detects a trusted network only if it matches any of the specified DNS domain suffixes.

-
Trusted Servers: If you choose this option, enter a trusted server address in the adjacent Trusted Servers field. A DNS server specified in this profile must translate the domain name of this server to its corresponding IP address and provide a TLS certificate. (Optional) In the Certificate Hash field, enter the hash of the public key of this certificate.
Certificate hash is not applicable for iOS devices.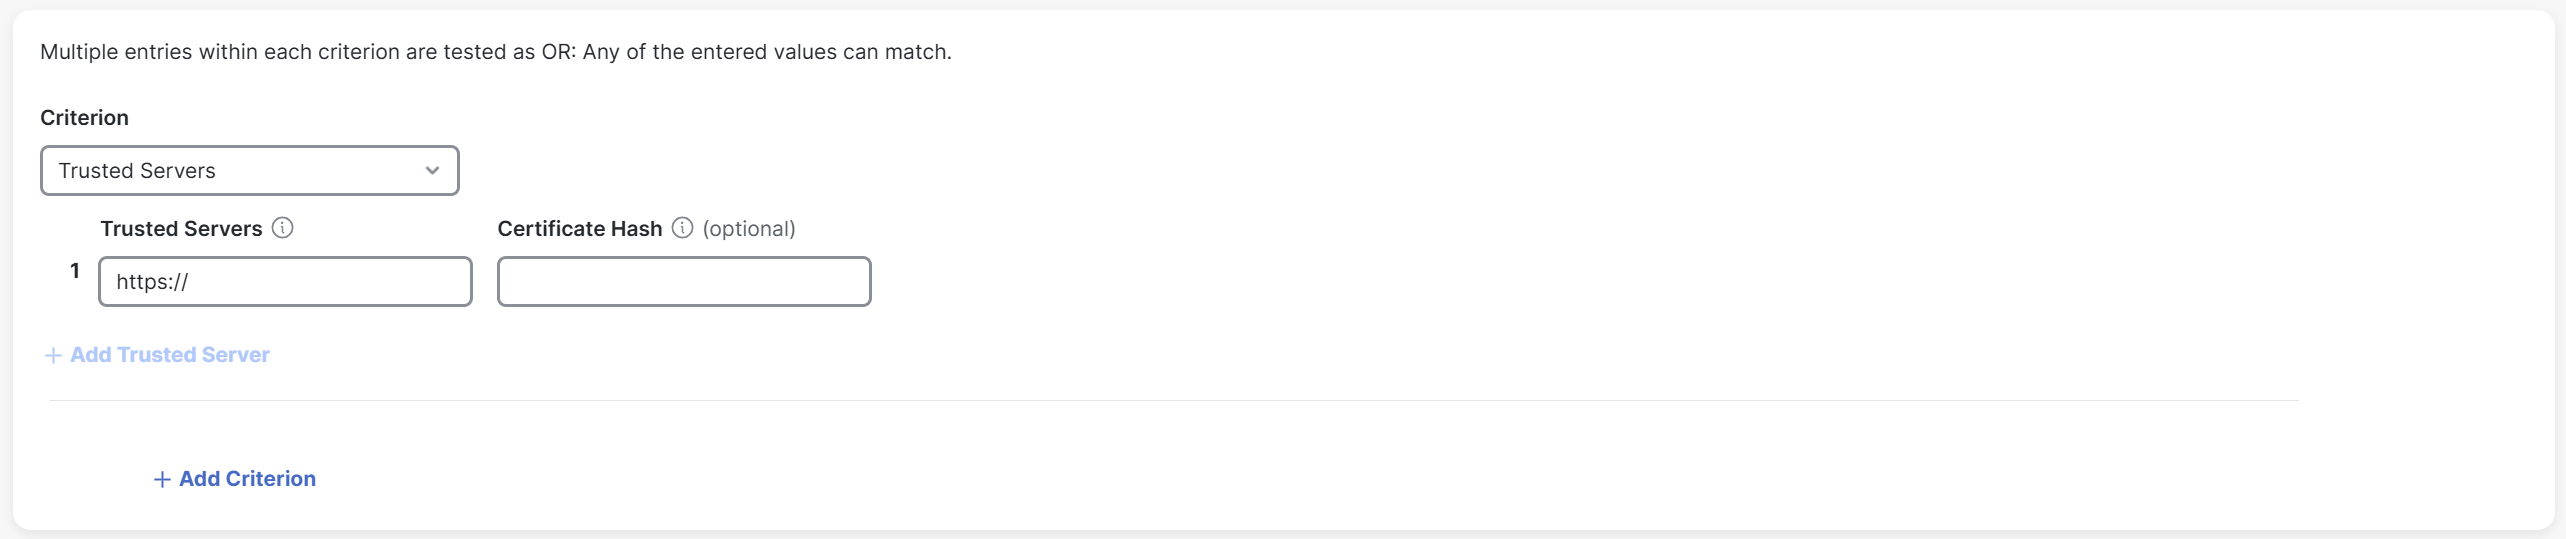
-
-
(Optional) Click +Add Trusted Server to add up to 10 trusted servers. Only one of the trusted servers is required to pass validation.
-
(Optional) Click +Add Criterion to add more criteria.
You can add a criteria only once. -
Click Save.


Note that if you provide multiple criteria for DNS domains, DNS servers, and trusted servers, the client will recognize a trusted network using any of the criteria provided.
The following is an example of this:
You provide the following criteria for these fields:
-
DNS Domains: YourCompany.com and AcquiredCompany.com
-
DNS Servers: 10.10.10.10 and 10.10.10.11
-
Trusted Servers: server1.YourCompany.com with hash _xyz _ and server2.YourCompany.com with hash abc
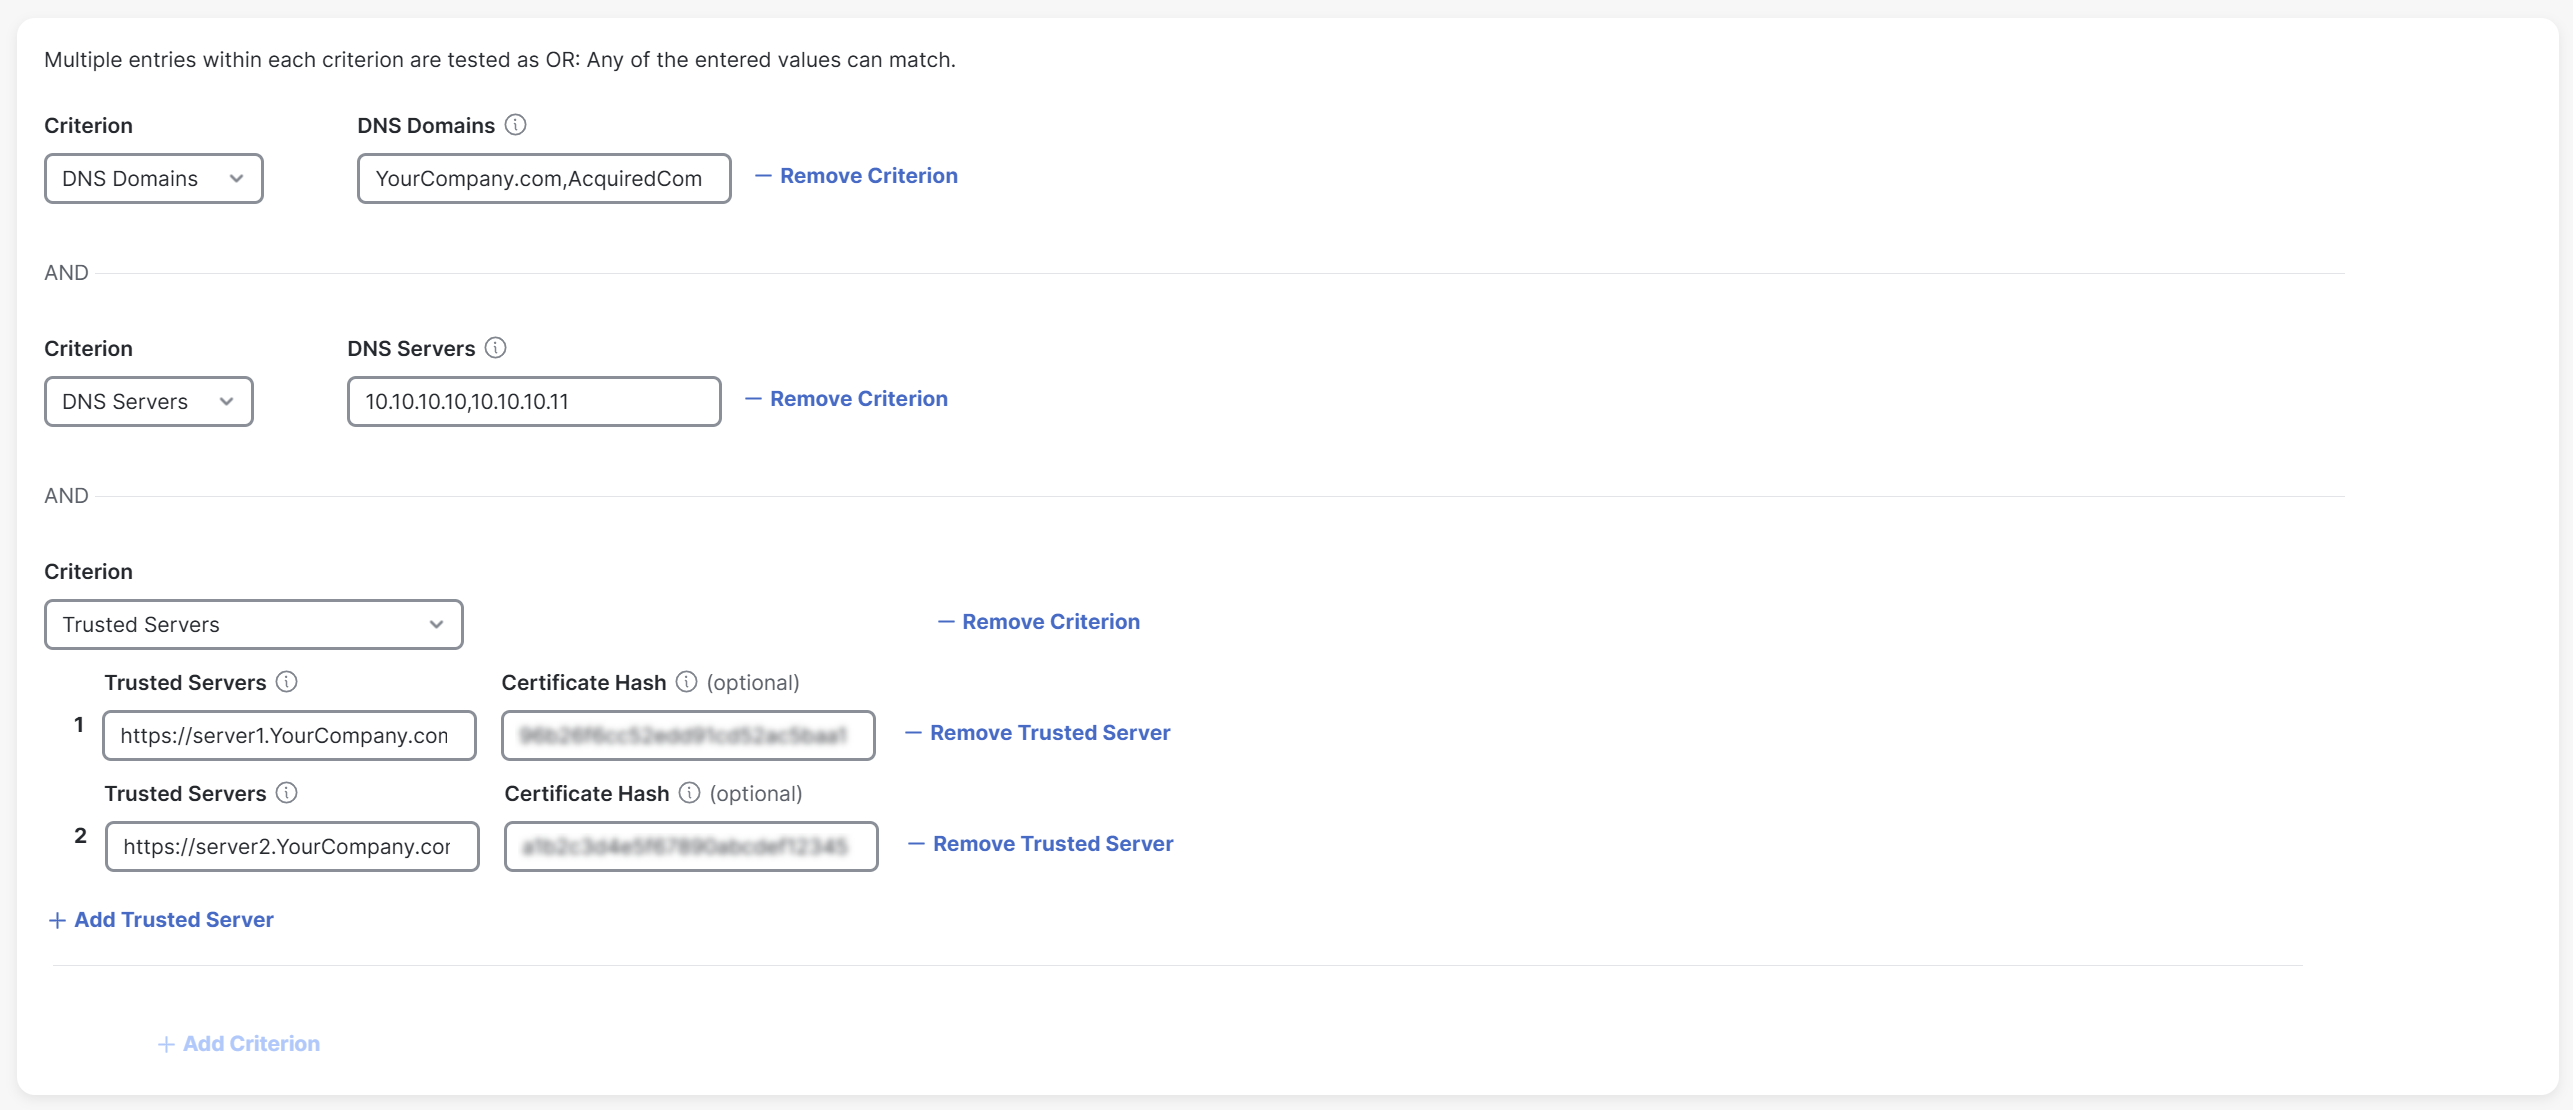

The client recognizes a trusted network based on any of the criteria provided by you.
- AcquiredCompany.com
- 10.10.10.11
- server2.YourCompany.com with hash abc