Add an IP Pool
To configure IP address pools for remote access VPNs, complete the following steps:
- Navigate to Connect > End User Connectivity > Virtual Private Network.
- Under Regions and IP Pools, click Manage.
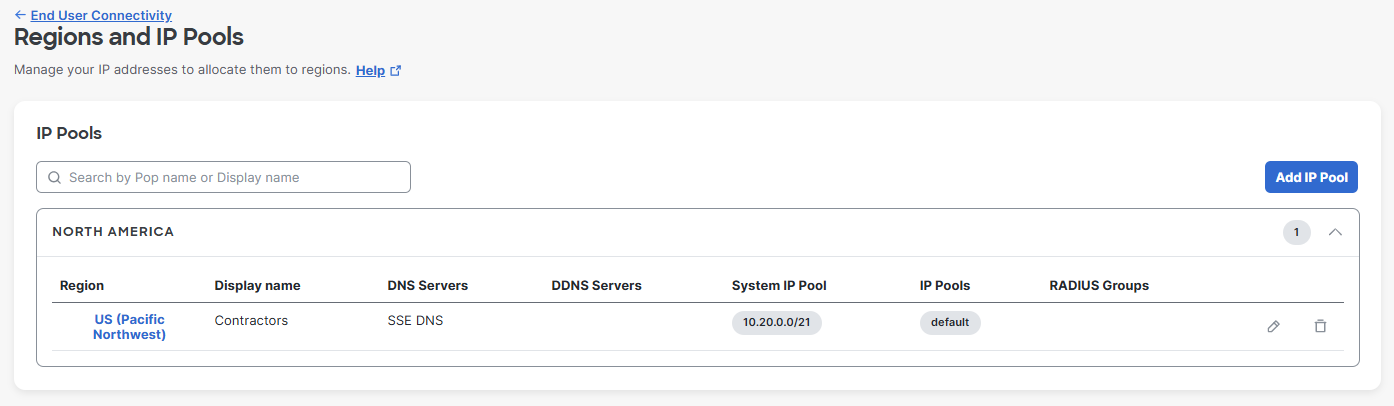
This opens the Regions and IP Pools pane. Each region requires unique IP pools for endpoint device remote access VPN connections.
-
Click Add IP Pool to add a set of IP addresses for a VPN profile.
-
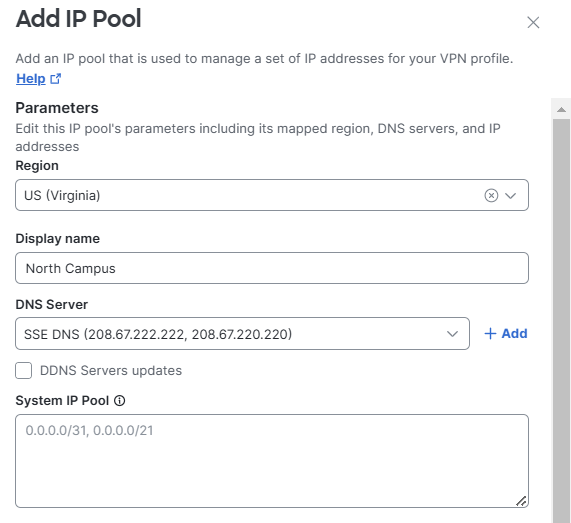
Configure the Parameters for this IP pool, including its mapped region, DNS servers, and IP addresses.
-
Select a Region for this IP pool from the drop-down.
-
Enter a Display Name for the region.
-
Choose a pair of DNS Servers from the drop-down, or click Add to add a new DNS pair.
-
Add a System IP Pool for administrative access to remote services. The System IP Pool is the network from which Secure Access as a system obtains an IP address to talk to services hosted in customer data centers.
- You can add IP ranges from /28 to /21, up to five subnets.
- Note that the subnets added for System IPs limit the overall amount of IPs available to the regional IP pools.
-
-
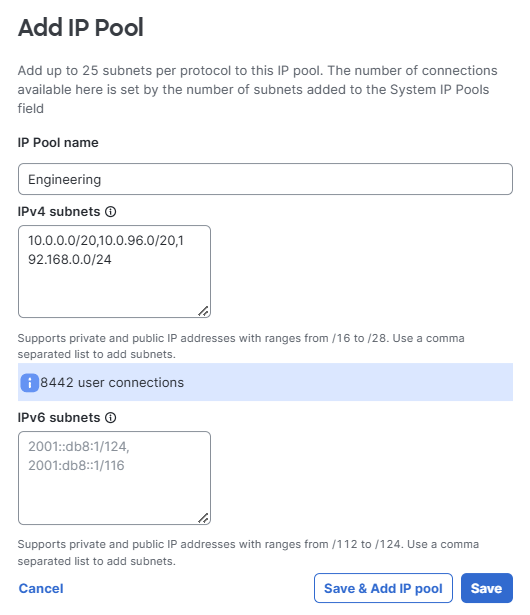
Scroll down to IP Pools and click Add IP Pool to add IP pools for the selected region.

-
Configure the Add IP Pool parameters:
-
Add a meaningful IP Pool name. An distinctive, easily recognized name is helpful when assigning IP pools and configuring VPN profiles.
-
Add IPv4 subnets for use with remote access VPN endpoints. Each endpoint will be assigned an IP address from the defined IP pool. Supports ranges from /28 to /16. You can add multiple comma-separated ranges.
-
Optionally, you can add IPv6 subnets for use with remote access VPN endpoints. Each endpoint will be assigned an IP address from the defined IP pool. Supports ranges from /112 to /124. You can add multiple comma-separated ranges.
-
-
Click Save & Add IP Pool when you are done. Click Save to save any edits to an IP address pool.


