Procedure
- In Secure Access, navigate to Connect > End User Connectivity and click
Internet Security. Click the iOS tab.
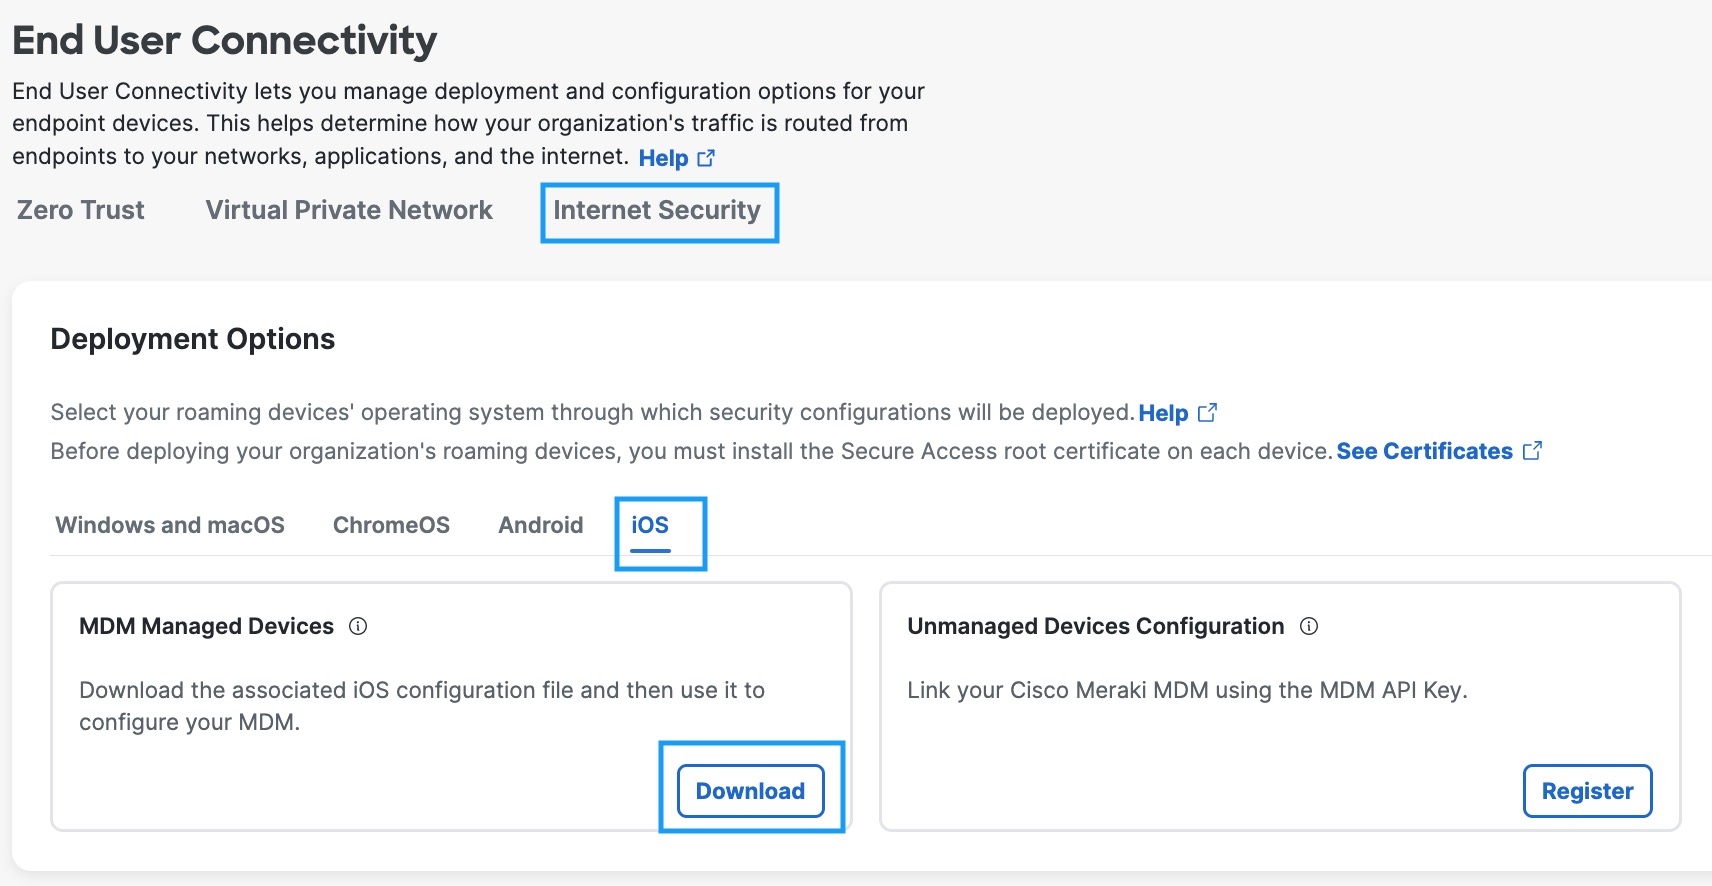
- Under the MDM Managed Devices section, click Download.
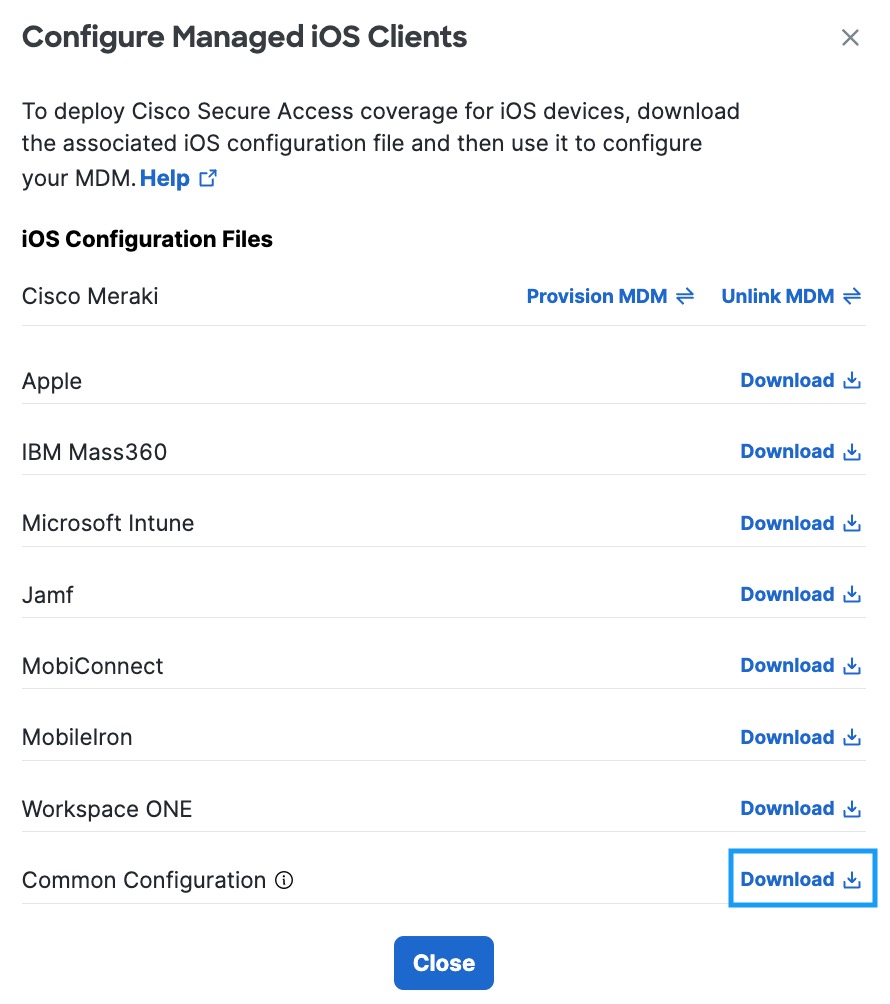
- In the Configure Managed iOS Clients window, click Download.
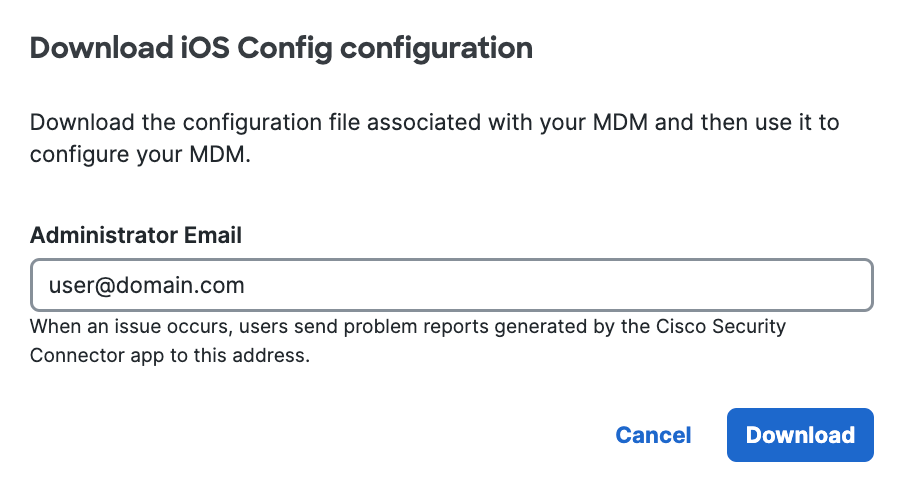
- Add the administrator's email address to which the problem report will be sent when an
issue occurs and click Download.
This email address is where diagnostic reports are sent when a user clicks the I icon from within the iOS device. Once set, this email address is automatically added when managing an MDM.
- In the downloaded XML file, update the line {SERIAL_NUMBER} with the iOS device's serial number. This can be achieved in one of two ways:
- Automatically—If your MDM system has its own variable and syntax for the variable {SERIAL_NUMBER}, replace this variable with your MDM's variable.
-
Manually—Open the downloaded XML file and update the line {SERIAL_NUMBER} with the device's serial number. For example, 1234567890.
Repeat this process for each iOS device—you must download and manually update an XML file for each device you want to register.
- Add this updated XML file to your MDM.
For information about configuring your specific MDM system, see your MDM system's documentation.


If successful, your mobile device registers with Secure Access and is listed at Resources > Roaming Devices > Mobile Operating Systems. CSC on your mobile device updates to connect to Secure Access so that your iOS device is protected by Secure Access.

If you have anonymized your device (see Anonymize Devices), Secure Access hides the device's true label name by replacing it with the device's serial number. Existing active devices anonymize with 24 hours. New devices anonymize immediately.

As no changes can be made in Secure Access to the actual provisioned device, these mobile devices are simply listed in Secure Access as identities; however, you can now use Secure Access to apply policies to these mobile device identities. For more information, see Apply a DNS Policy to Your Mobile Device.