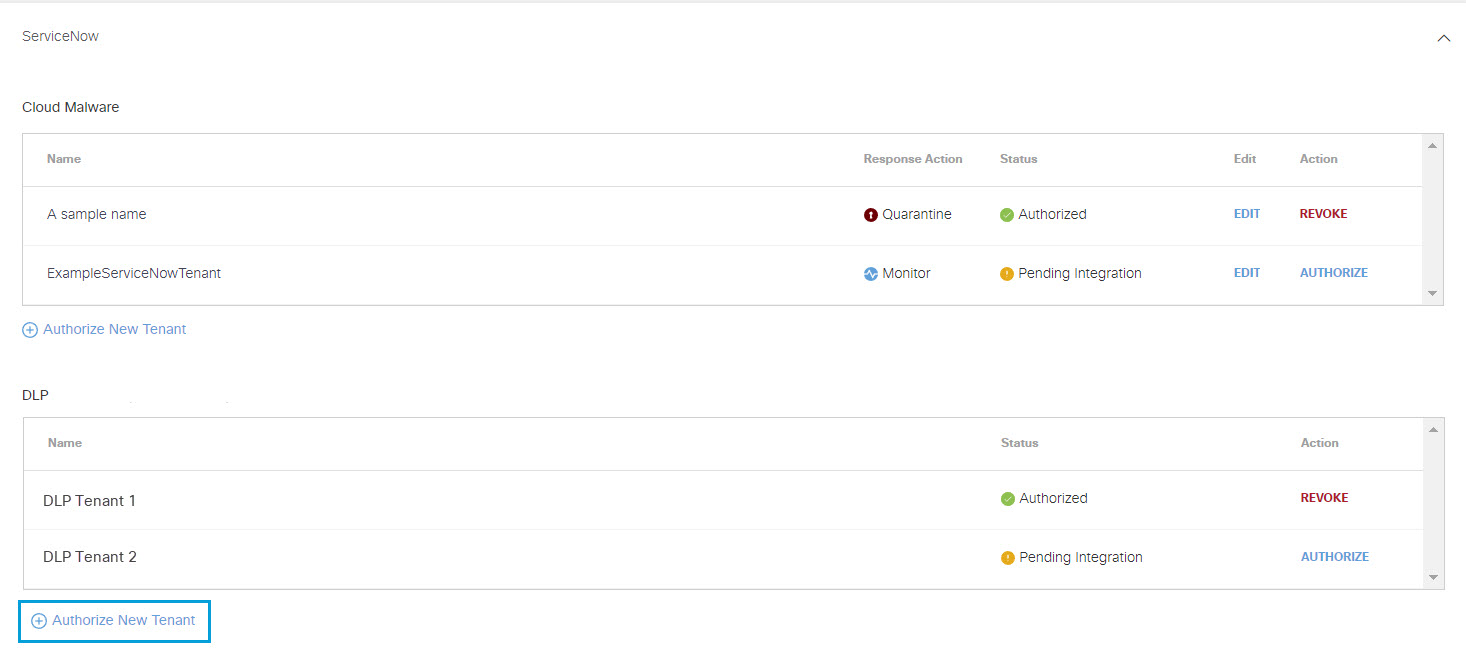
Authorize a Tenant
- Navigate to Admin > Authentication.
- Under Platforms, click ServiceNow.
- In the DLP subsection, click Authorize New Tenant to add a ServiceNow tenant to your Secure Access environment.
- In the ServiceNow Authorization dialog, check the checkbox to verify you meet the prerequisite, then click Next.
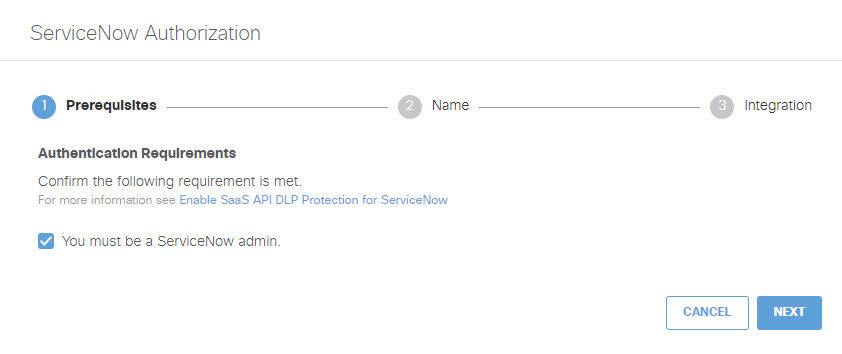
- Provide a name for your tenant, then click Next.

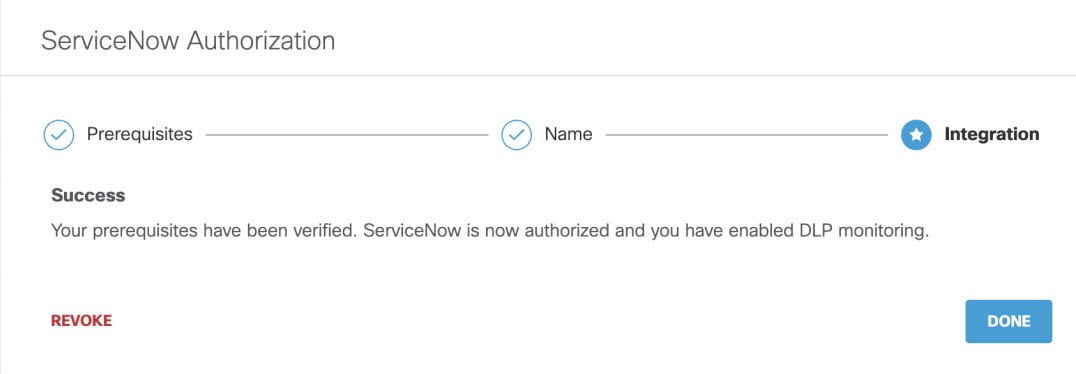
- Enter the following and then click Done.
-
Account ID: Enter the Instance Name for your ServiceNow account.
-
Client ID: Enter the Name you supplied in Step 3 of Add an OAuth Client to Your ServiceNow Deployment.
-
Client Secret: Enter the Client Secret you supplied in Step 3 of Add an OAuth Client to Your ServiceNow Deployment.

-
- You are redirected to the ServiceNow OAuth login page and a message will appear notifying you that secure-access-oauth would like to connect to your ServiceNow account. Click Allow.
- You are redirected to Secure Access and a message appears showing the integration was successful. It may be up to 24 hours for the integration to be confirmed and appear as Authorized. Click Done to complete.