Step 2: Create a network tunnel group in Secure Access
Configure a network tunnel group in Secure Access. For a more detailed procedure, see Add a Network Tunnel Group.
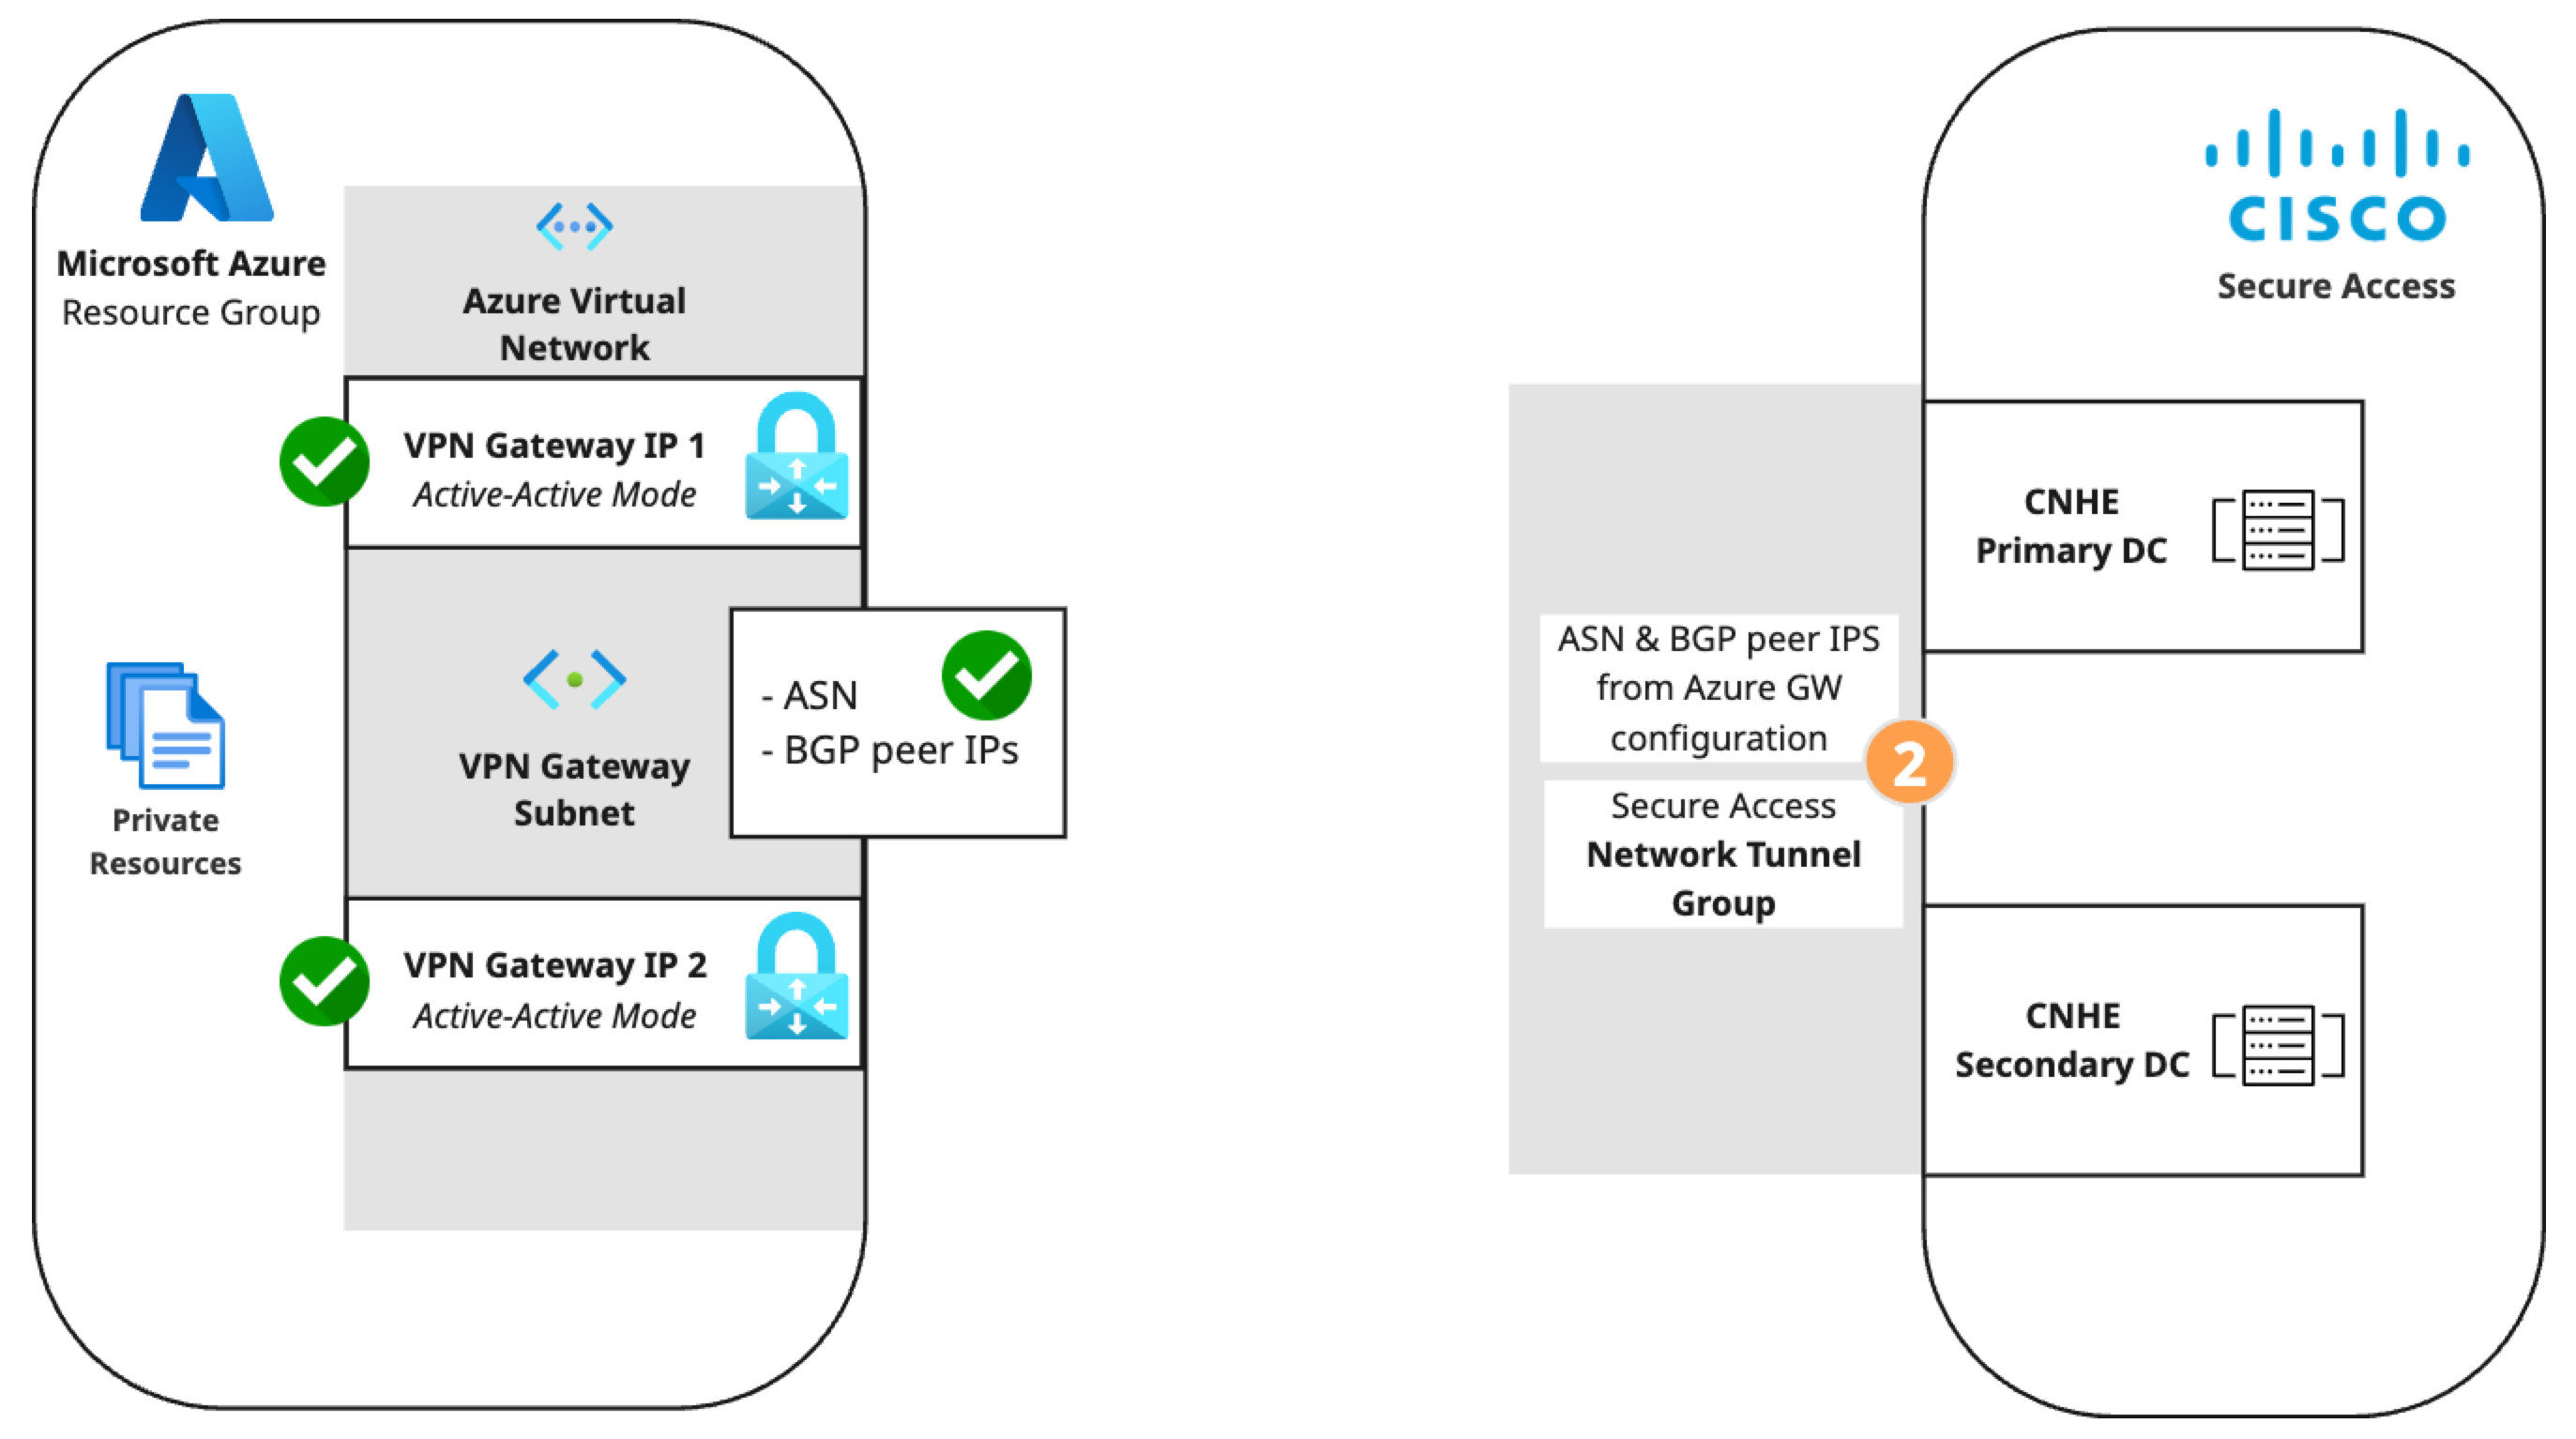
- Step 1 - General Settings: Set Device Type to AZURE.
- Step 2 - Tunnel ID and Passphrase: Enter the primary and secondary public IPs from the Azure virtual network gateway and create a passphrase.
-
Step 3 - Routing
- Select Dynamic routing.
- Device AS Number: Enter the ASN configured for the Azure virtual network gateway. This example uses 64515.
- BGP peer IP address 1 and 2: Enter two private IP address ranges (RFC1918). This example uses 10.255.255.254/32 and 10.255.255.255/32.
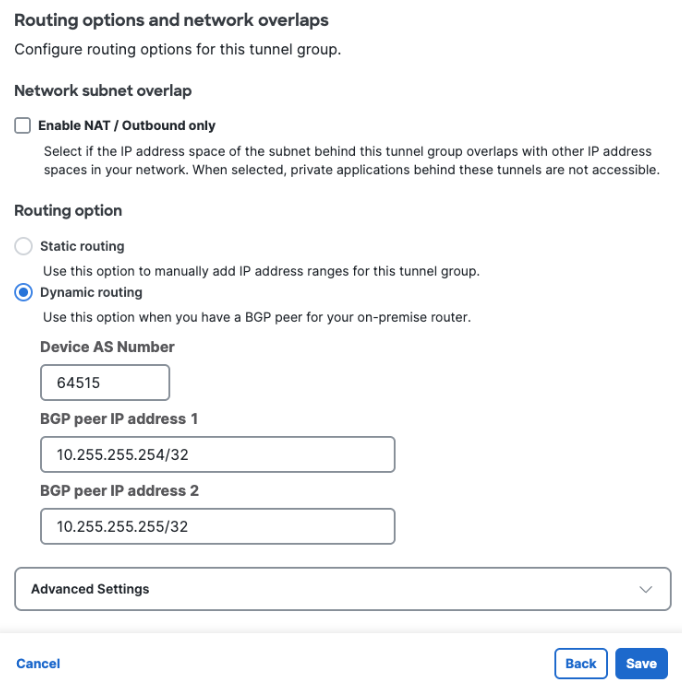

BGP peer IP address compatibility between Azure and Secure AccessBy default, Secure Access CNHE listens for BGP peer requests in the the APIPA address range 169.254.0.0/24. Azure does not initiate BGP connections to peers in the range 169.254.0.0/16. To work around this limitation, configure the Secure Access tunnel group to listen for BGP peer requests from two RFC1918 private IP ranges. These ranges should not overlap with 169.254.0.0/16 or with ranges assigned to your other branches that connect to Secure Access.
-
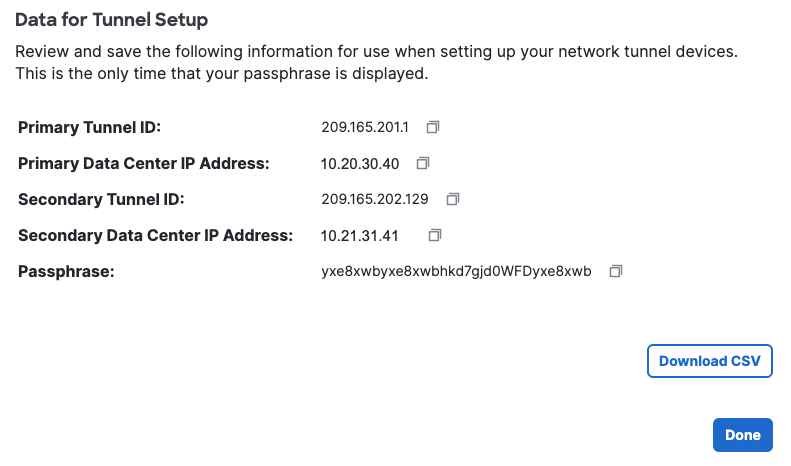
Step 4 - Data for Tunnel Setup: Copy or download the primary and secondary tunnel IDs, data center (DC) IP addresses, and the passphrase you created. Note: This is the only time your passphrase will be displayed.