Configure Site-to-Site VPN
You can now configure the site-to-site VPN.
- Navigate to Devices > VPN > Site to Site > Add VPN > Secure Firewall Threat Defense Device.

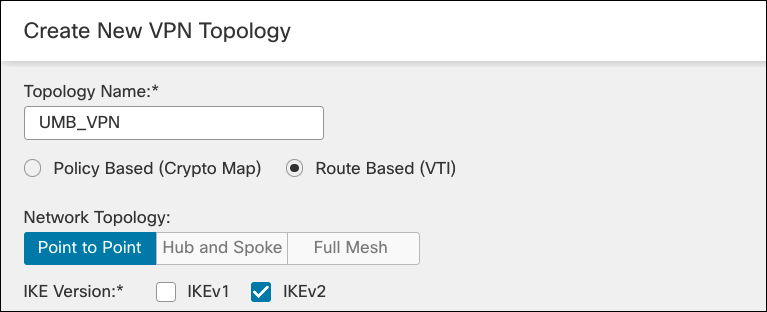
- Enter a name for the topology, select Route Based (VTI), and check IKEv2 box. For more information about supported protocols, see Supported IPSec Parameters.
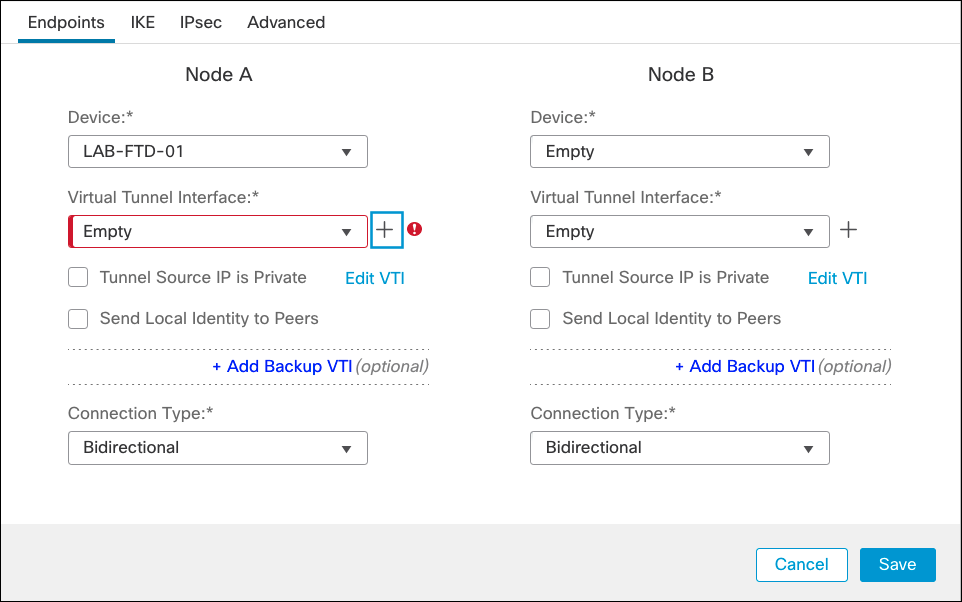
- Choose a Secure Firewall device from the Device drop-down list for Node A and click Add to add a Virtual Tunnel Interface.
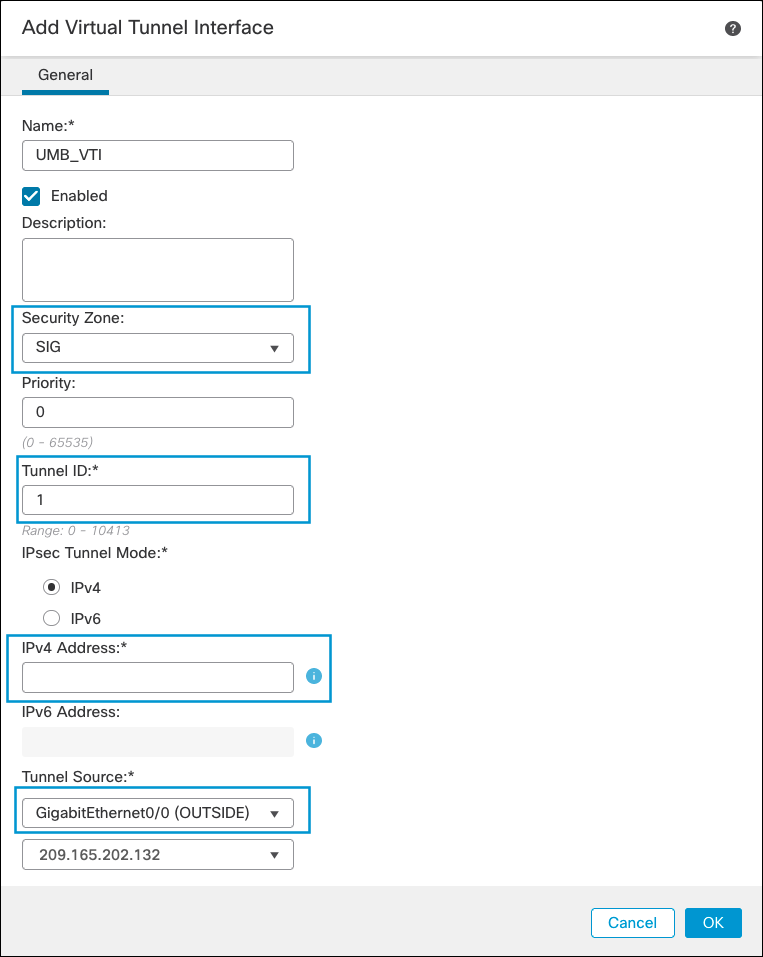
- Enter a name for the VTI, choose an existing Security Zone or create a new for the tunnel, enter a Tunnel ID and an IP address (a /30 subnet to accommodate local device and remote IP), and select the OUTSIDE interface as tunnel source. Then click Ok.
- Select the VTI you just created and check Send Local Identity to Peers.
- Select Email ID from the Local Identity Configuration dropdown.
- Type the FQDN of the previously created tunnel.

For greater throughput you can configure multiple tunnels to the same Secure Access network tunnel group. For multiple tunnels, select Key ID from the Local Identity Configuration dropdown, then enter the Key ID for each tunnel, separated by a + sign.
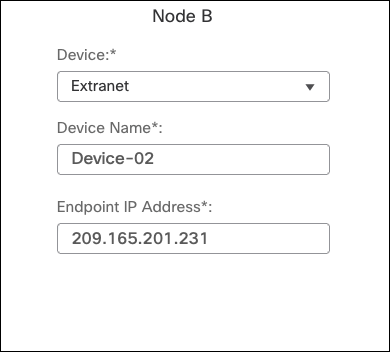
- Under Node B, choose Extranet as the device, enter a name and IP address of a Secure Access data center.
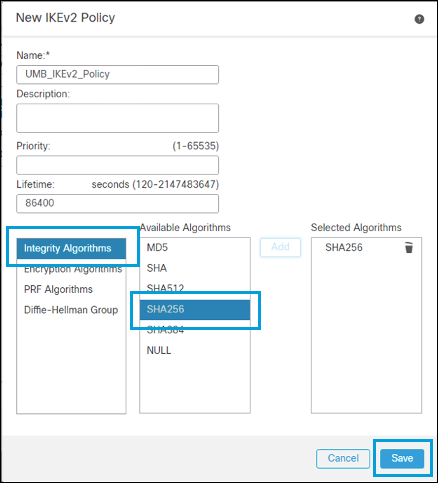
- Enter a name for the IKEv2 policy, then select the parameters from the list.
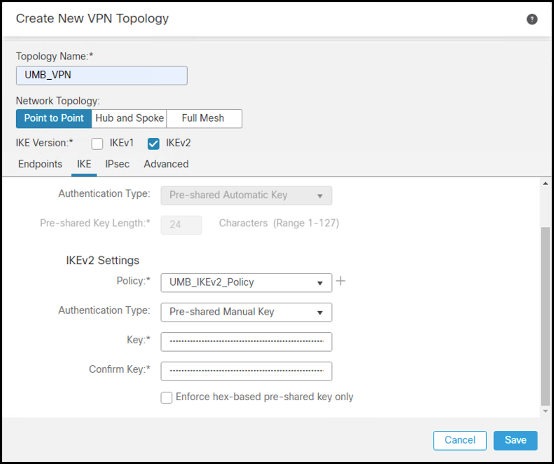
- After saving the IKEv2 Policy, select it. Choose Pre-shared Manual Key from the Authentication drop-down list and enter the key.
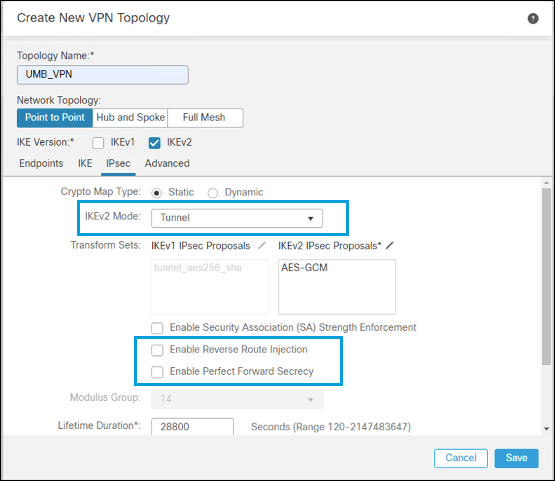
- Under IPSec Configuration, add a new IKEv2 IPsec Proposal with your crypto algorithms or select an existing profile. Select Tunnel for IKEv2 Mode and uncheck Enable Reverse Route Injection and Enable Perfect Forward Secrecy.
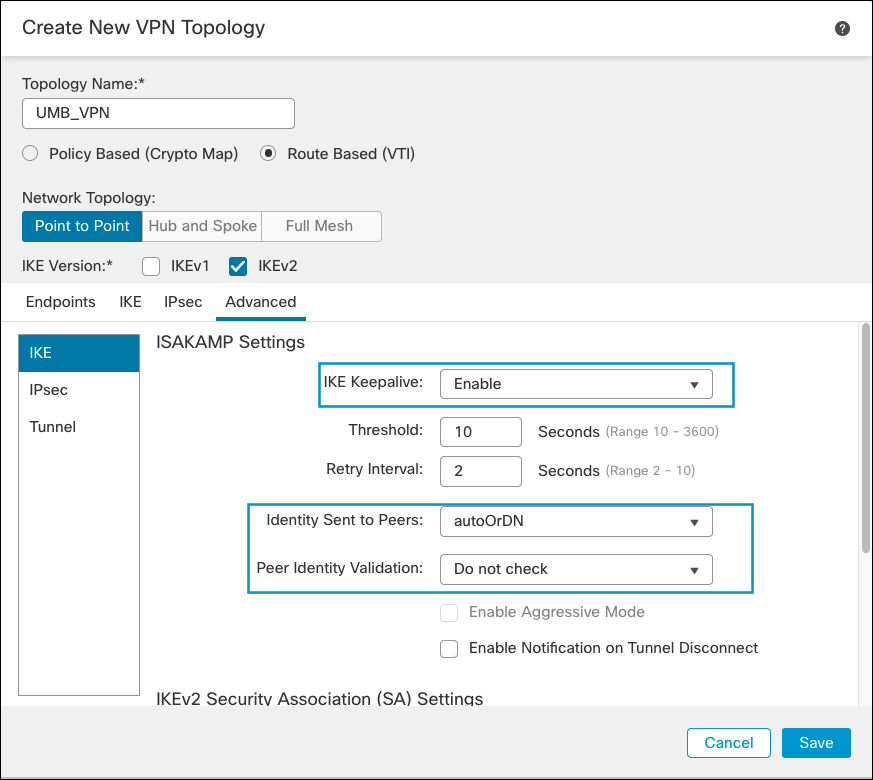
- In the Advanced tab under IKE, enable IKE Keepalive. Select autoOrDN as the Identity Sent to Peers, and disable Peer Identity Validation. Then click Save.