Step 2: Configure a Tunnel in Meraki MX
Configure a Meraki Third Party (non-Meraki) VPN tunnel to connect a Meraki MX/Z4 series device to Cisco Secure Access.
-
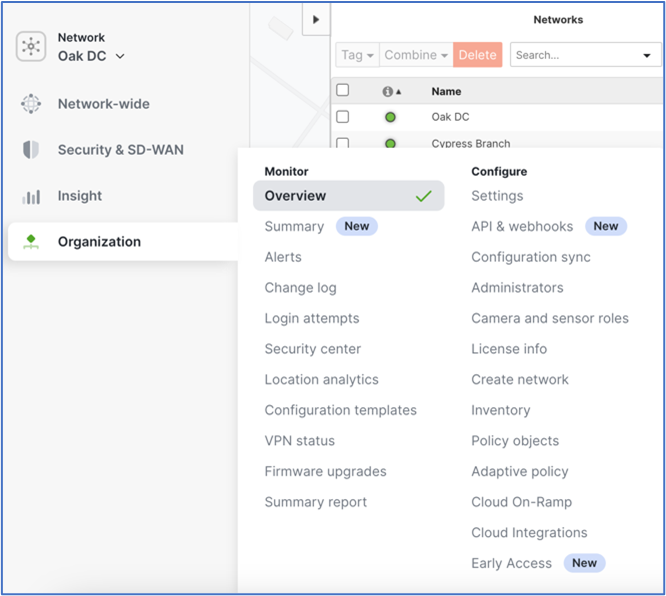
In the Meraki MX dashboard, navigate to the Organization > Monitor > Overview page.
If the page is not expanded by default, expand the Networks list by clicking the left-facing arrow at the top of the network list.
-
Select the desired network from the networks Name list. Select only the network that will connect to the Secure Access Network Tunnel Group.

-
Add a Network tag to the selected network. Select the Tag dropdown menu from the top left. A tag can be created by typing into the field and then clicking Add.

It is recommended that the same name is used for the Meraki Network Tag as the Secure Access Network Tunnel Group.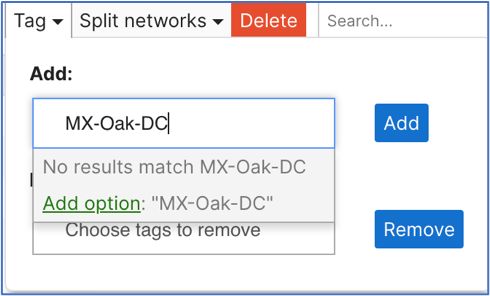
-
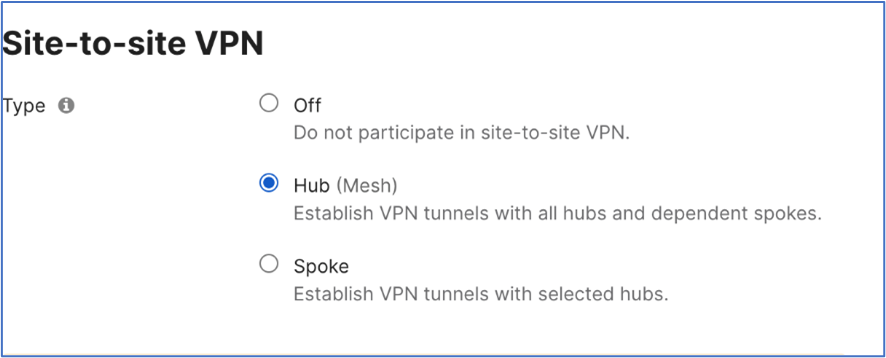
While in the Meraki dashboard, navigate to Security & SD-WAN > Site-to-site VPN, and choose Hub (Mesh).
-
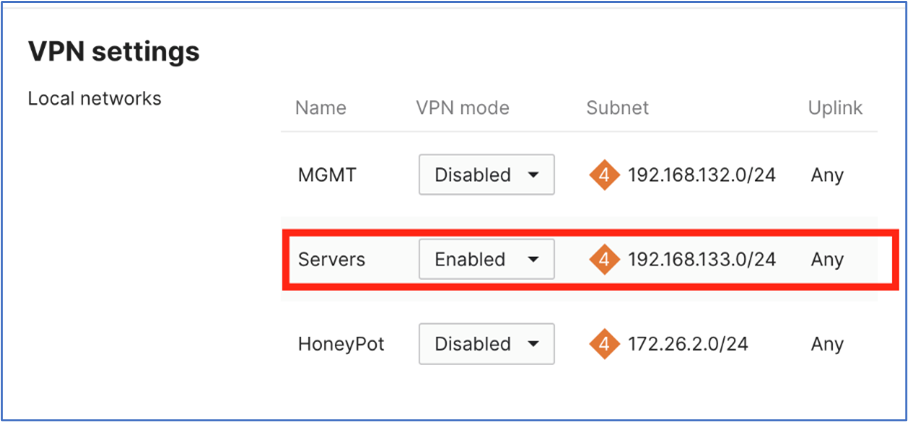
Next, in the same section, find the VPN settings and choose Enabled for the VLANs that will use the new Secure Access network tunnel group.
-
Scroll down to find Organization-wide settings to locate the Non-Meraki VPN Peers section. Click Add a peer and then add the tunnel ID and tunnel passphrase that you created in Step 1: Add a Network Tunnel Group in Secure Access.
-
Configure the IPsec parameter settings:
-
Name—Provide a meaningful name for the tunnel.
-
IKE Version—Select IKEv2.
-
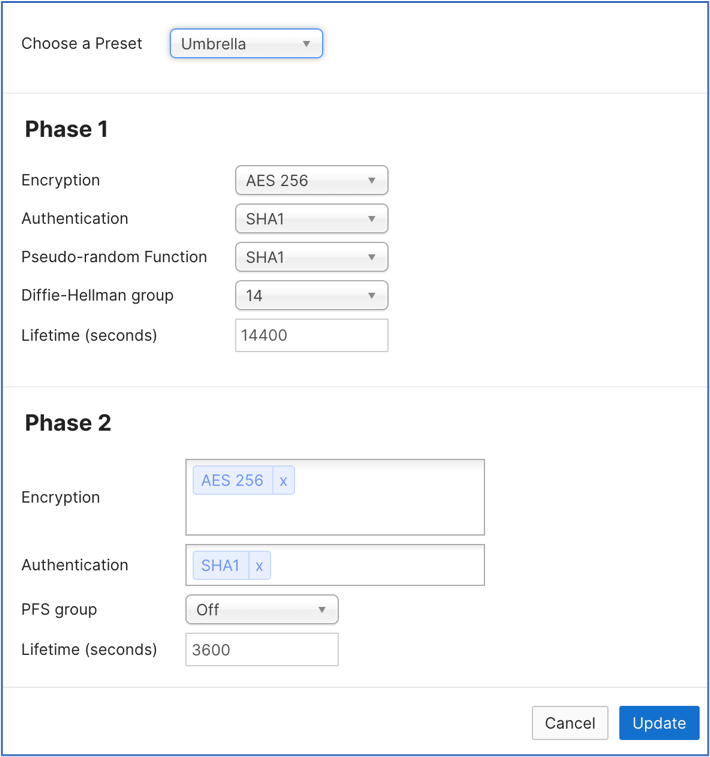
IPsec policies Choose the predefined Umbrella configuration; see Supported IPsec Parameters.
-
Public IP—IP address to connect to Secure Access Network Tunnel Group Primary Data Center IP.
-
Local ID—The Primary Tunnel ID for the Network Tunnel Group.
-
Remote ID—Leave this blank.
-
Private subnets—There are 2 common configurations for Private Subnets:
- If the desired behavior is to use Secure Internet Access and Secure Private Access to access applications on tunnel-enabled vlans/subnets, then the only entry here should be 0.0.0.0/0. This will route all traffic to Secure Access for either Secure Internet Access, Remote Access VPN, or ZTA clients.
- If only Remote Private Application access is required, then all subnets that are used by the Secure Access infrastructure must be entered:
- CGNAT 100.64.0.0/10
- RA VPN and Management IP Pool subnets.
-
Preshared secret—This is the Passphrase for the Network Tunnel Group created in Secure Access.
-
Availability—Enter the Network tag you defined earlier for the MX appliance that builds the tunnels to Secure Access.
Do not leave this field blank. Ideally this field should match the Network tag entered in Step 3 above. Leaving this field blank, "All Networks", or entering a tag that is associated with multiple networks could cause one or more tunnels to become unstable. This could lead to unexpected behavior and cause an NMVPN tunnel to not be established.
-
- Click Save.
Upon completion of these steps, you should have a functioning tunnel routing your traffic as intended.


