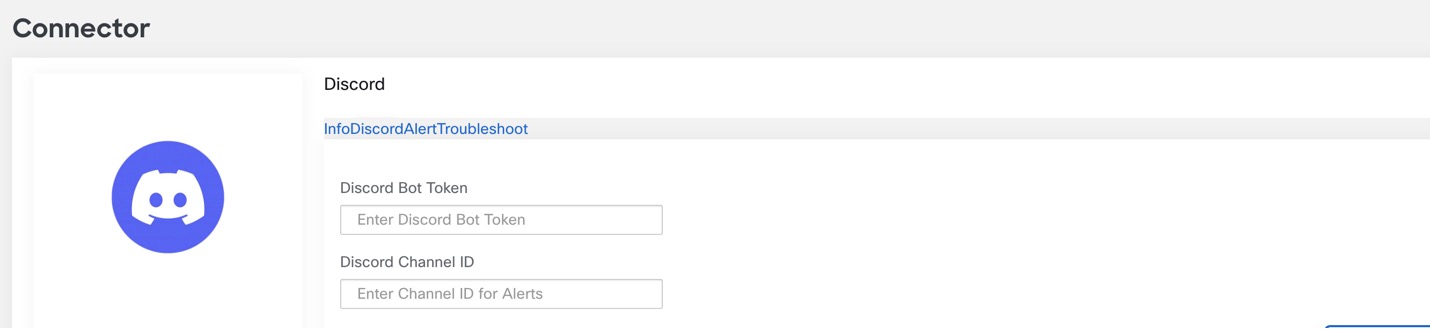
Configure Discord Connector
To configure a Discord connector, ensure that the following information is available:
-
Discord Bot Token
-
Discord Channel ID
Procedure
| 1 |
To setup a new bot on the Discord channel, refer to To create a discord bot, got to How to Build your Bot. |
||
| 2 |
Select New Application, enter the details in the Create an Application page, and click Create. 
|
||
| 3 |
From the navigation pane, choose Bot and enable the Message Intent Content button. |
||
| 4 |
Click on Reset token, which will generate a new access token. |
||
| 5 |
After the bot is created, you will receive an access token. Ensure that the token is stored securily because this token is used for integration with Cisco Secure Workload 
|
||
| 6 |
(Optional) Open Discord channel and click Add Server if you want to create a new one. |
||
| 7 |
From the navigation pane, navigate to the Application page, choose Installation and copy the install link.
|
||
| 8 |
From the dropdown, select the required Discord sever and click Continue and Authorize. 
The bot has permissions now to send alerts to the Discord server.
|
||
| 9 |
From the Discord server, choose the channel you want to receive alerts. Right- click on it and select copy channel ID. 
Now that you have the configurations needed to create a Discord connector, create a connector with the Discord Bot Token and Discord Channel ID. Based on the Alert Config, below is a sample alert: 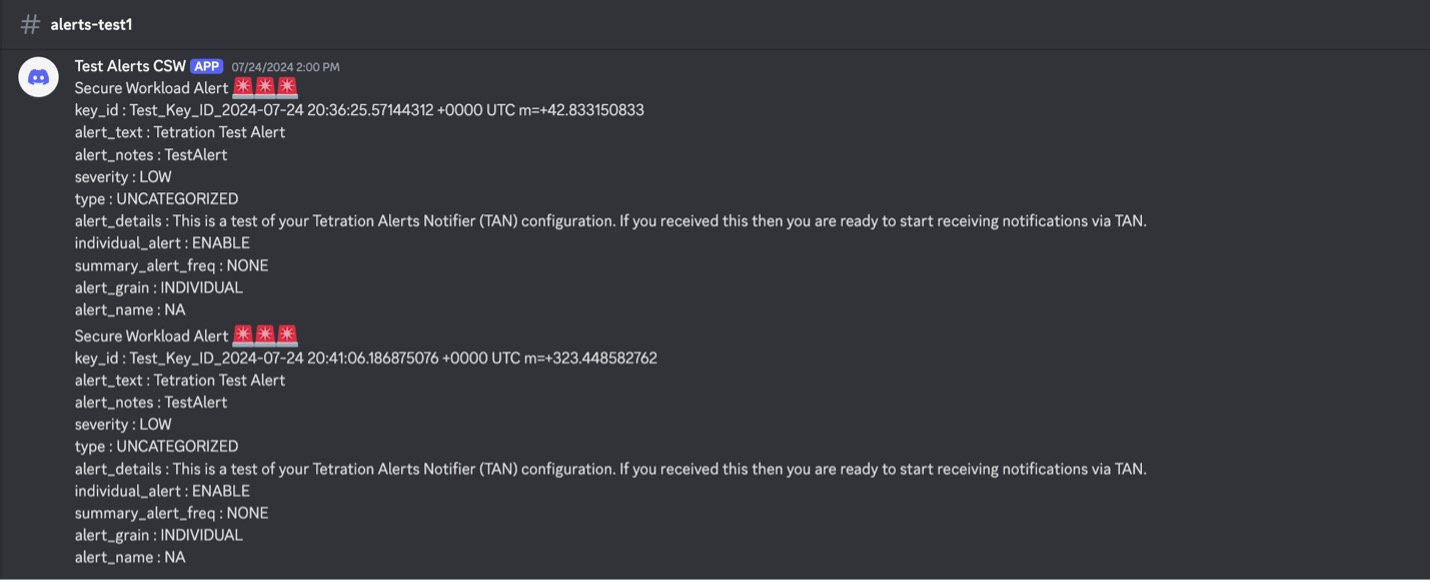
|
